Identity verification lets workers verify their identity directly inside their onboarding tasks — no extra apps or logins required. Workers scan a government-issued ID, and optionally complete a selfie or liveness check. Onboarded extracts the data, stores a verified identity record, and automatically cross-references it against compliance forms (I-9, W-4) to flag mismatches before they become problems.
Setting up identity verification takes about 10 minutes. You'll connect your Persona account to Onboarded, then add a verification step to your onboarding forms.
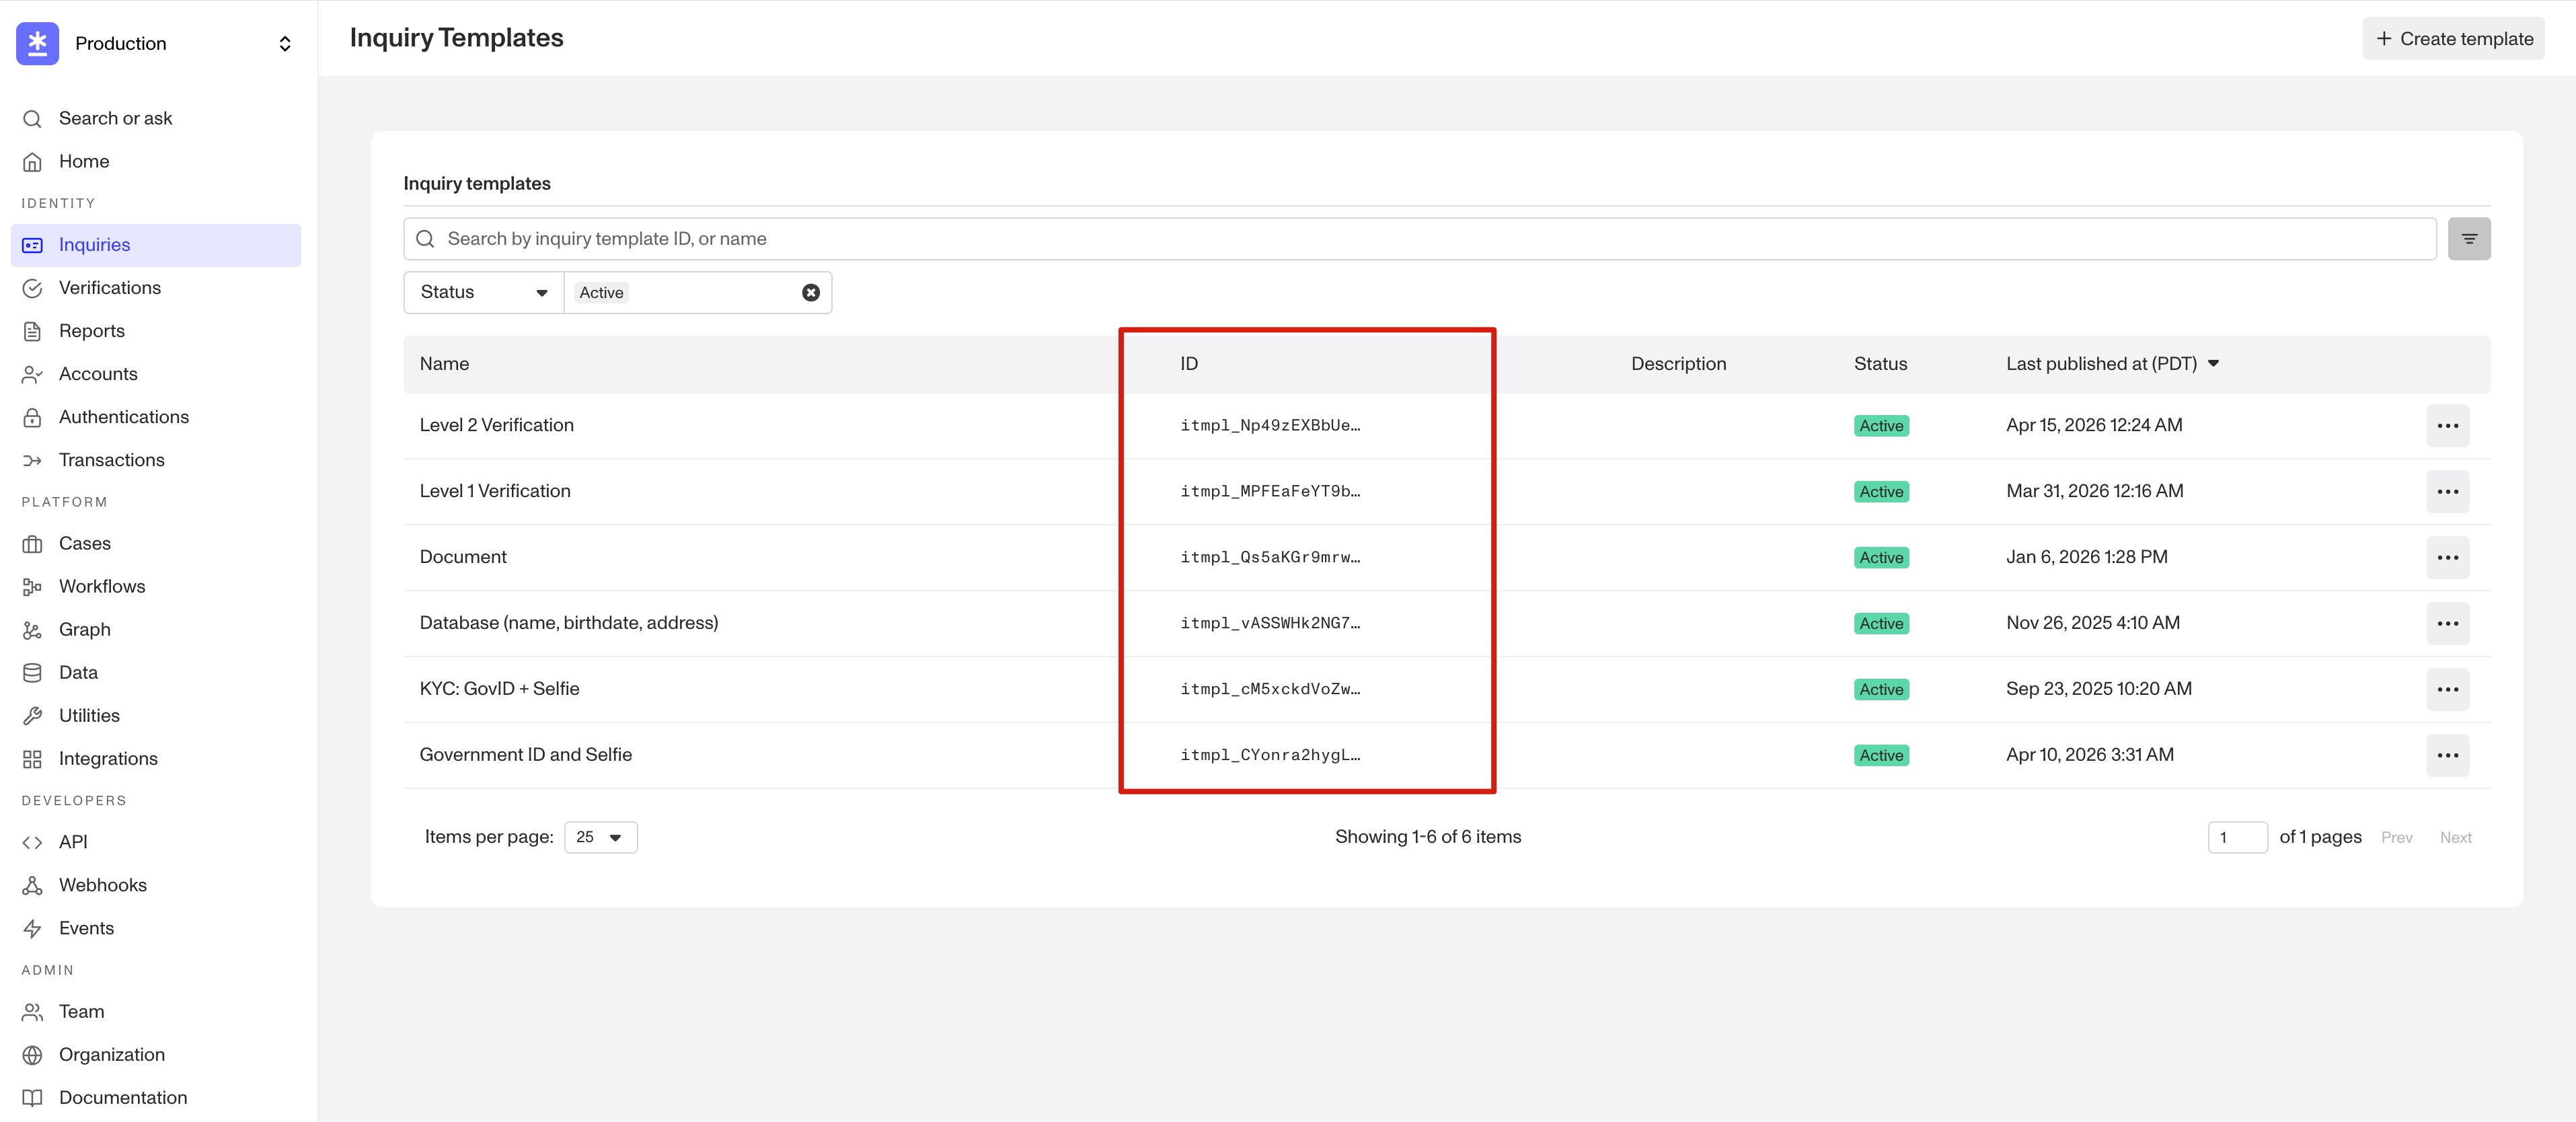
Templates control what workers are asked to do during verification. You create them in your Persona Dashboard under Templates > Create template.
You can choose the level of verification that fits your needs:
| What you need | Template to create |
|---|---|
| Verify the document is real | Government ID — captures and validates the ID |
| Verify the document + match the person | Government ID + Selfie |
| Full verification with liveness | Government ID + Selfie + Liveness |
Tip: Always use Government ID templates. Generic templates don't extract structured data (name, DOB, document number), so automatic cross-referencing won't work.
Once created, copy the Template ID (it looks like itmpl_...) — you'll need it later.
Still in the Persona Dashboard:
- Settings > API Keys — copy or create an API key
- Settings > Environment — copy the Environment ID (e.g.,
env_...)
The webhook is how Persona tells Onboarded that a verification is complete. Set this up before the next step — you'll need the webhook secret it generates.
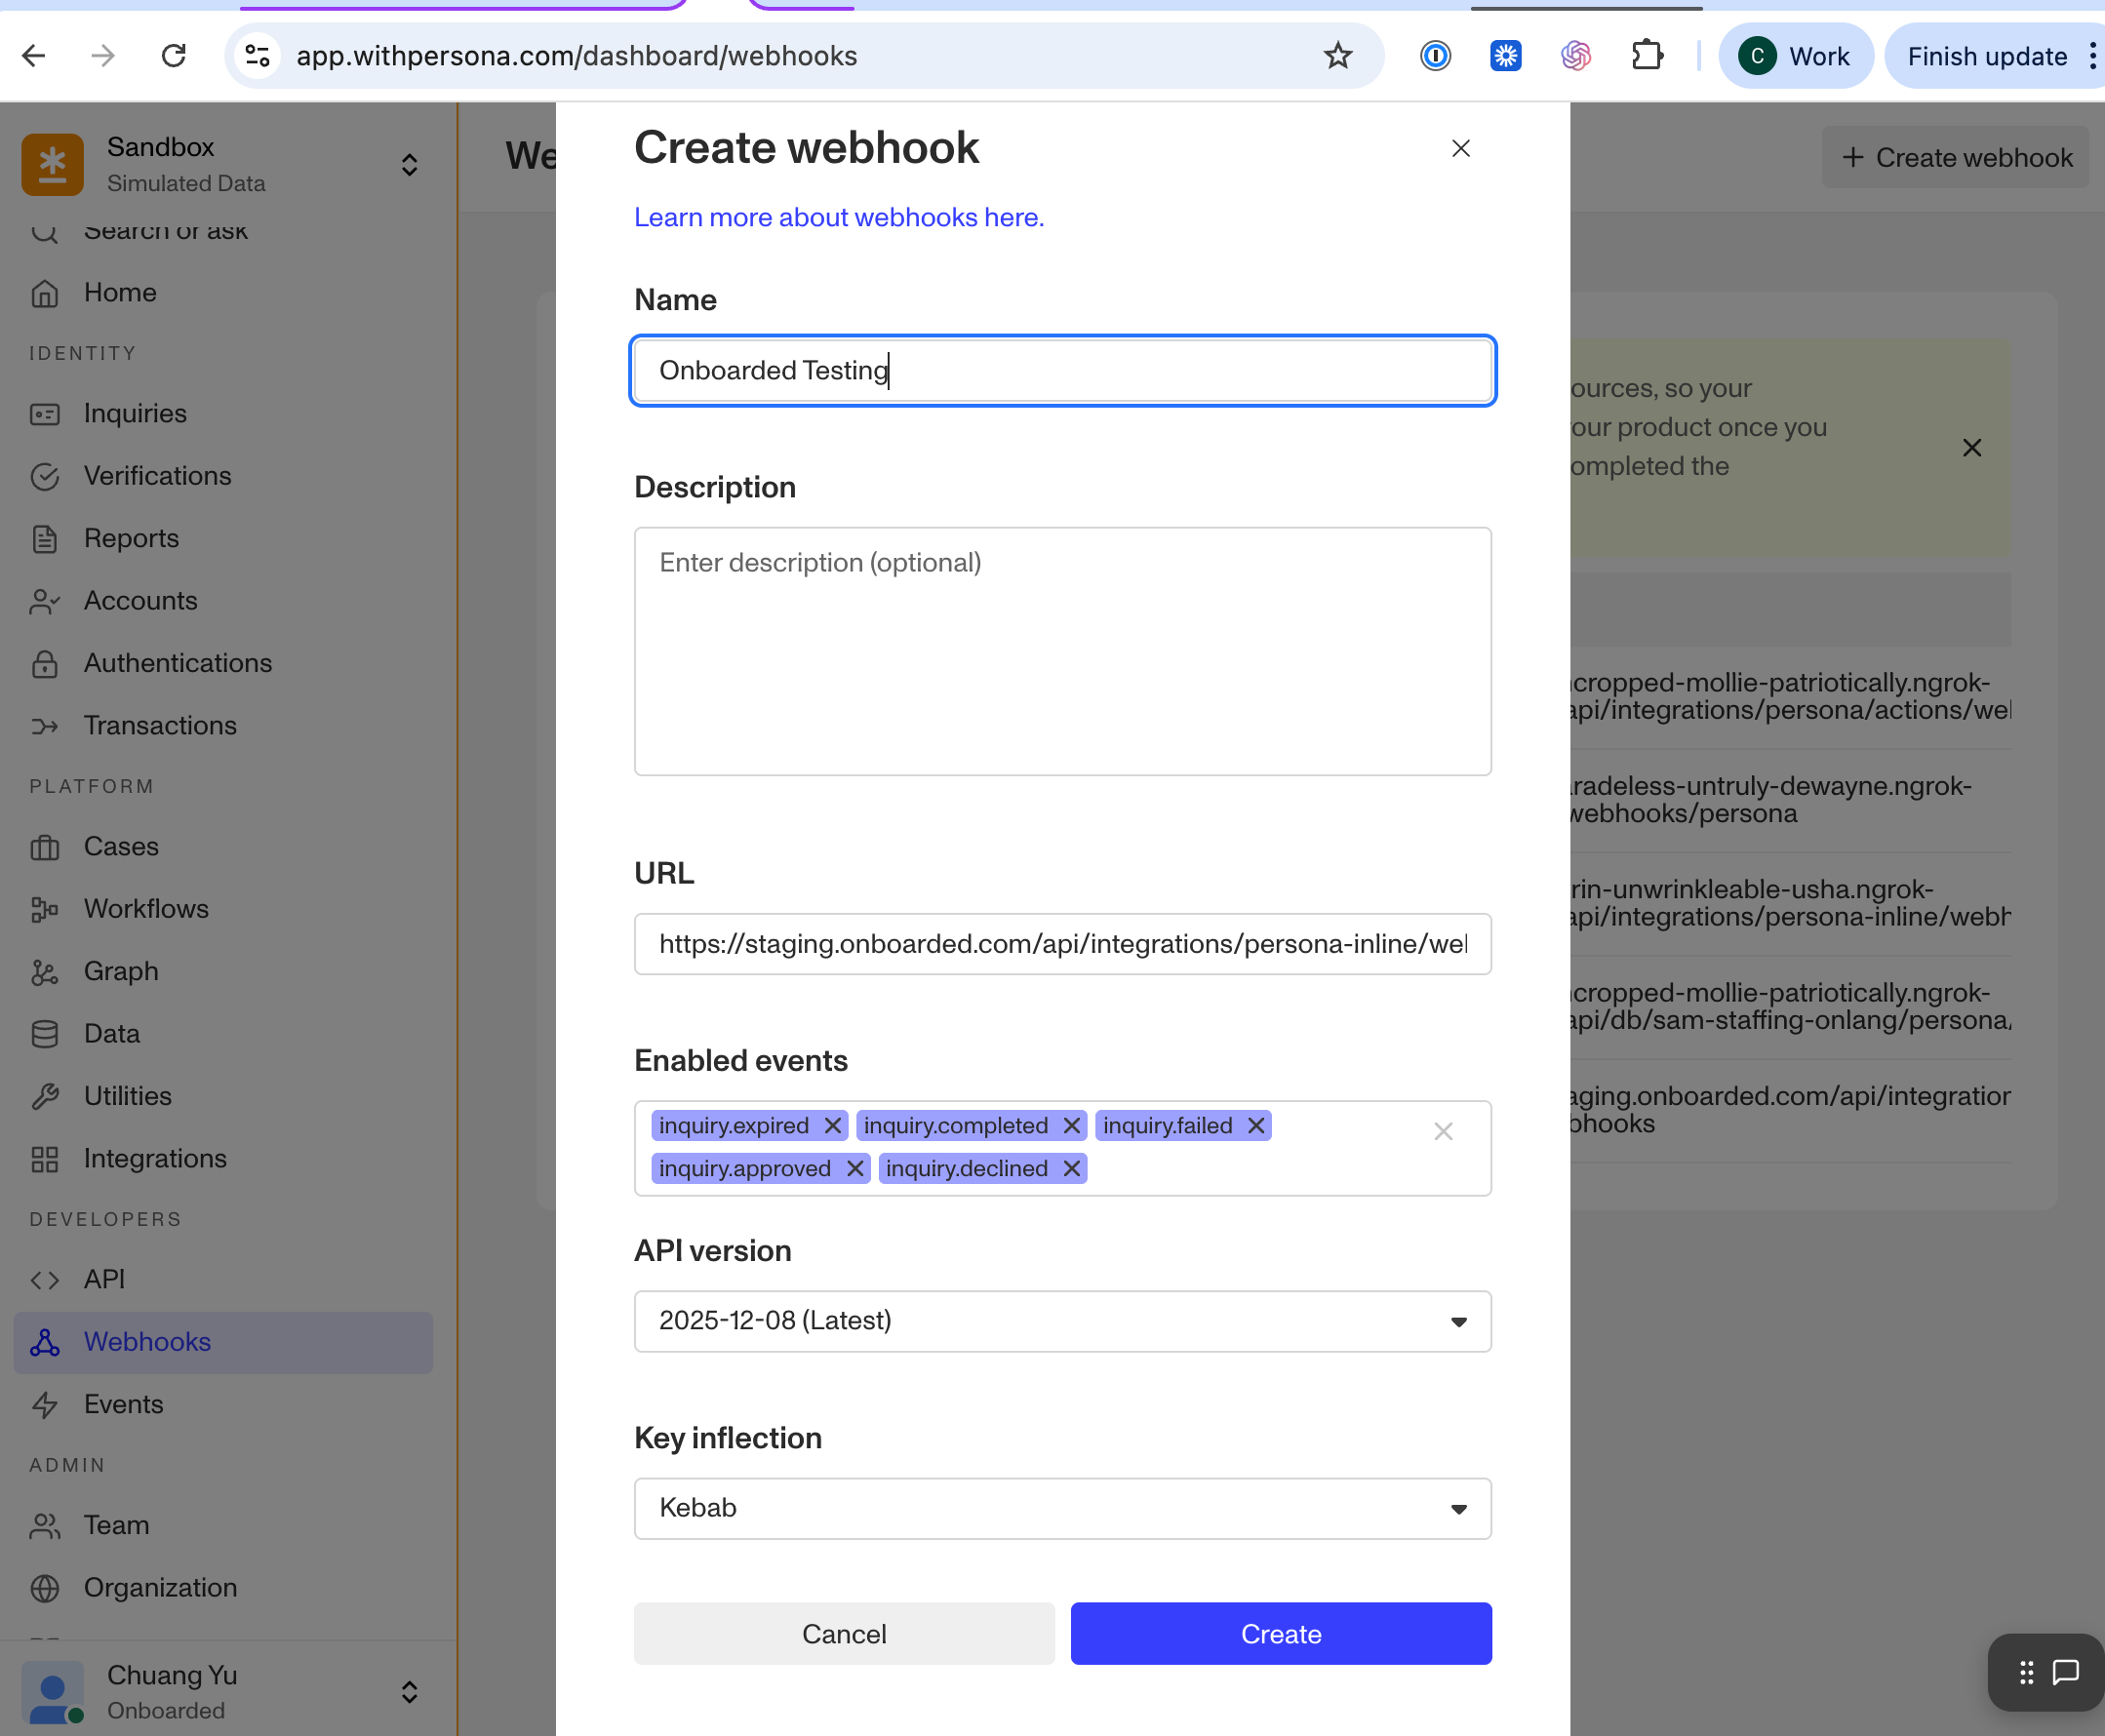
- In the Persona Dashboard, go to Webhooks
- Add a new webhook with these settings:
- URL:
https://<your-onboarded-domain>/api/integrations/persona-inline/webhooks - Events:
inquiry.completed,inquiry.approved,inquiry.declined,inquiry.failed,inquiry.expired - Key inflection: Select Kebab (
kebab-case) — this is required for Onboarded to process the data correctly.
- URL:
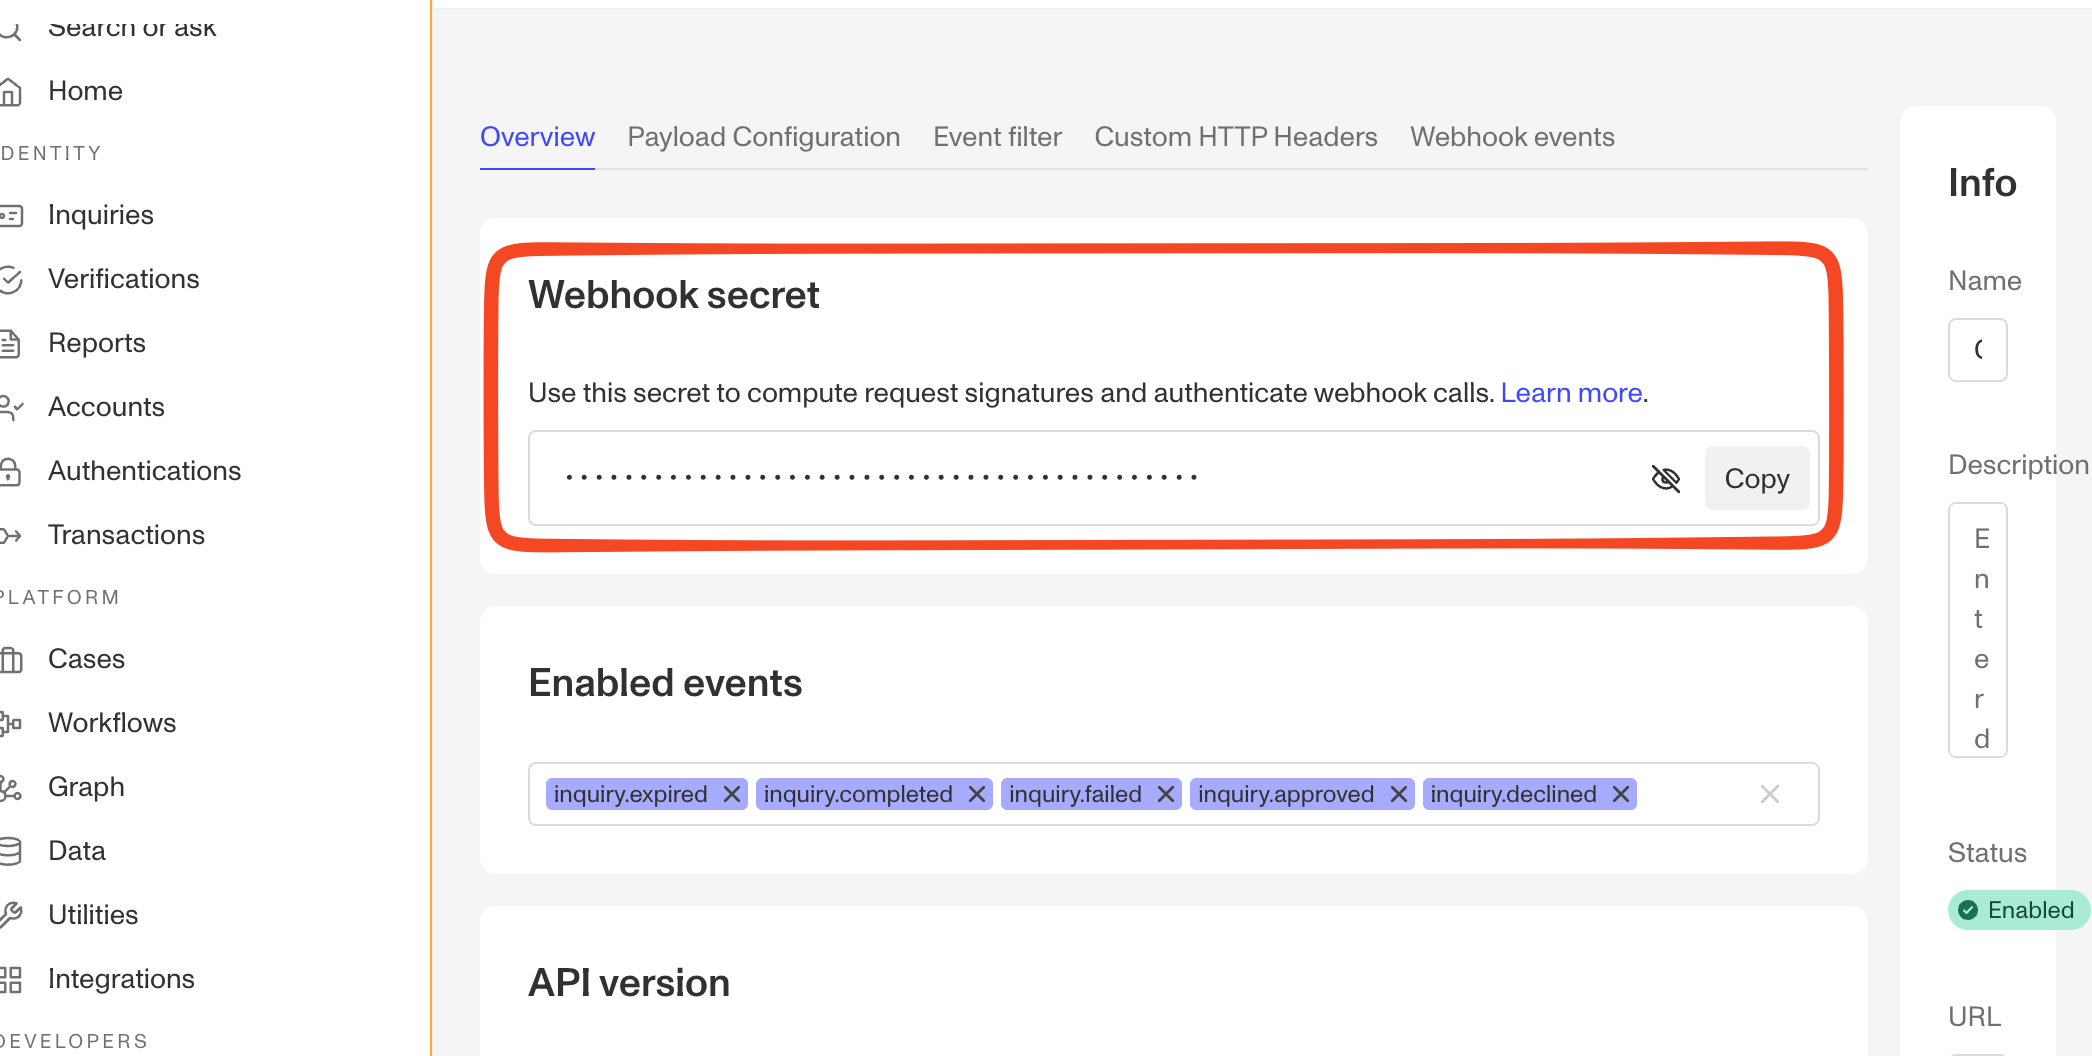
- Copy the Webhook Secret.
- In Onboarded, go to Account Settings > Integrations
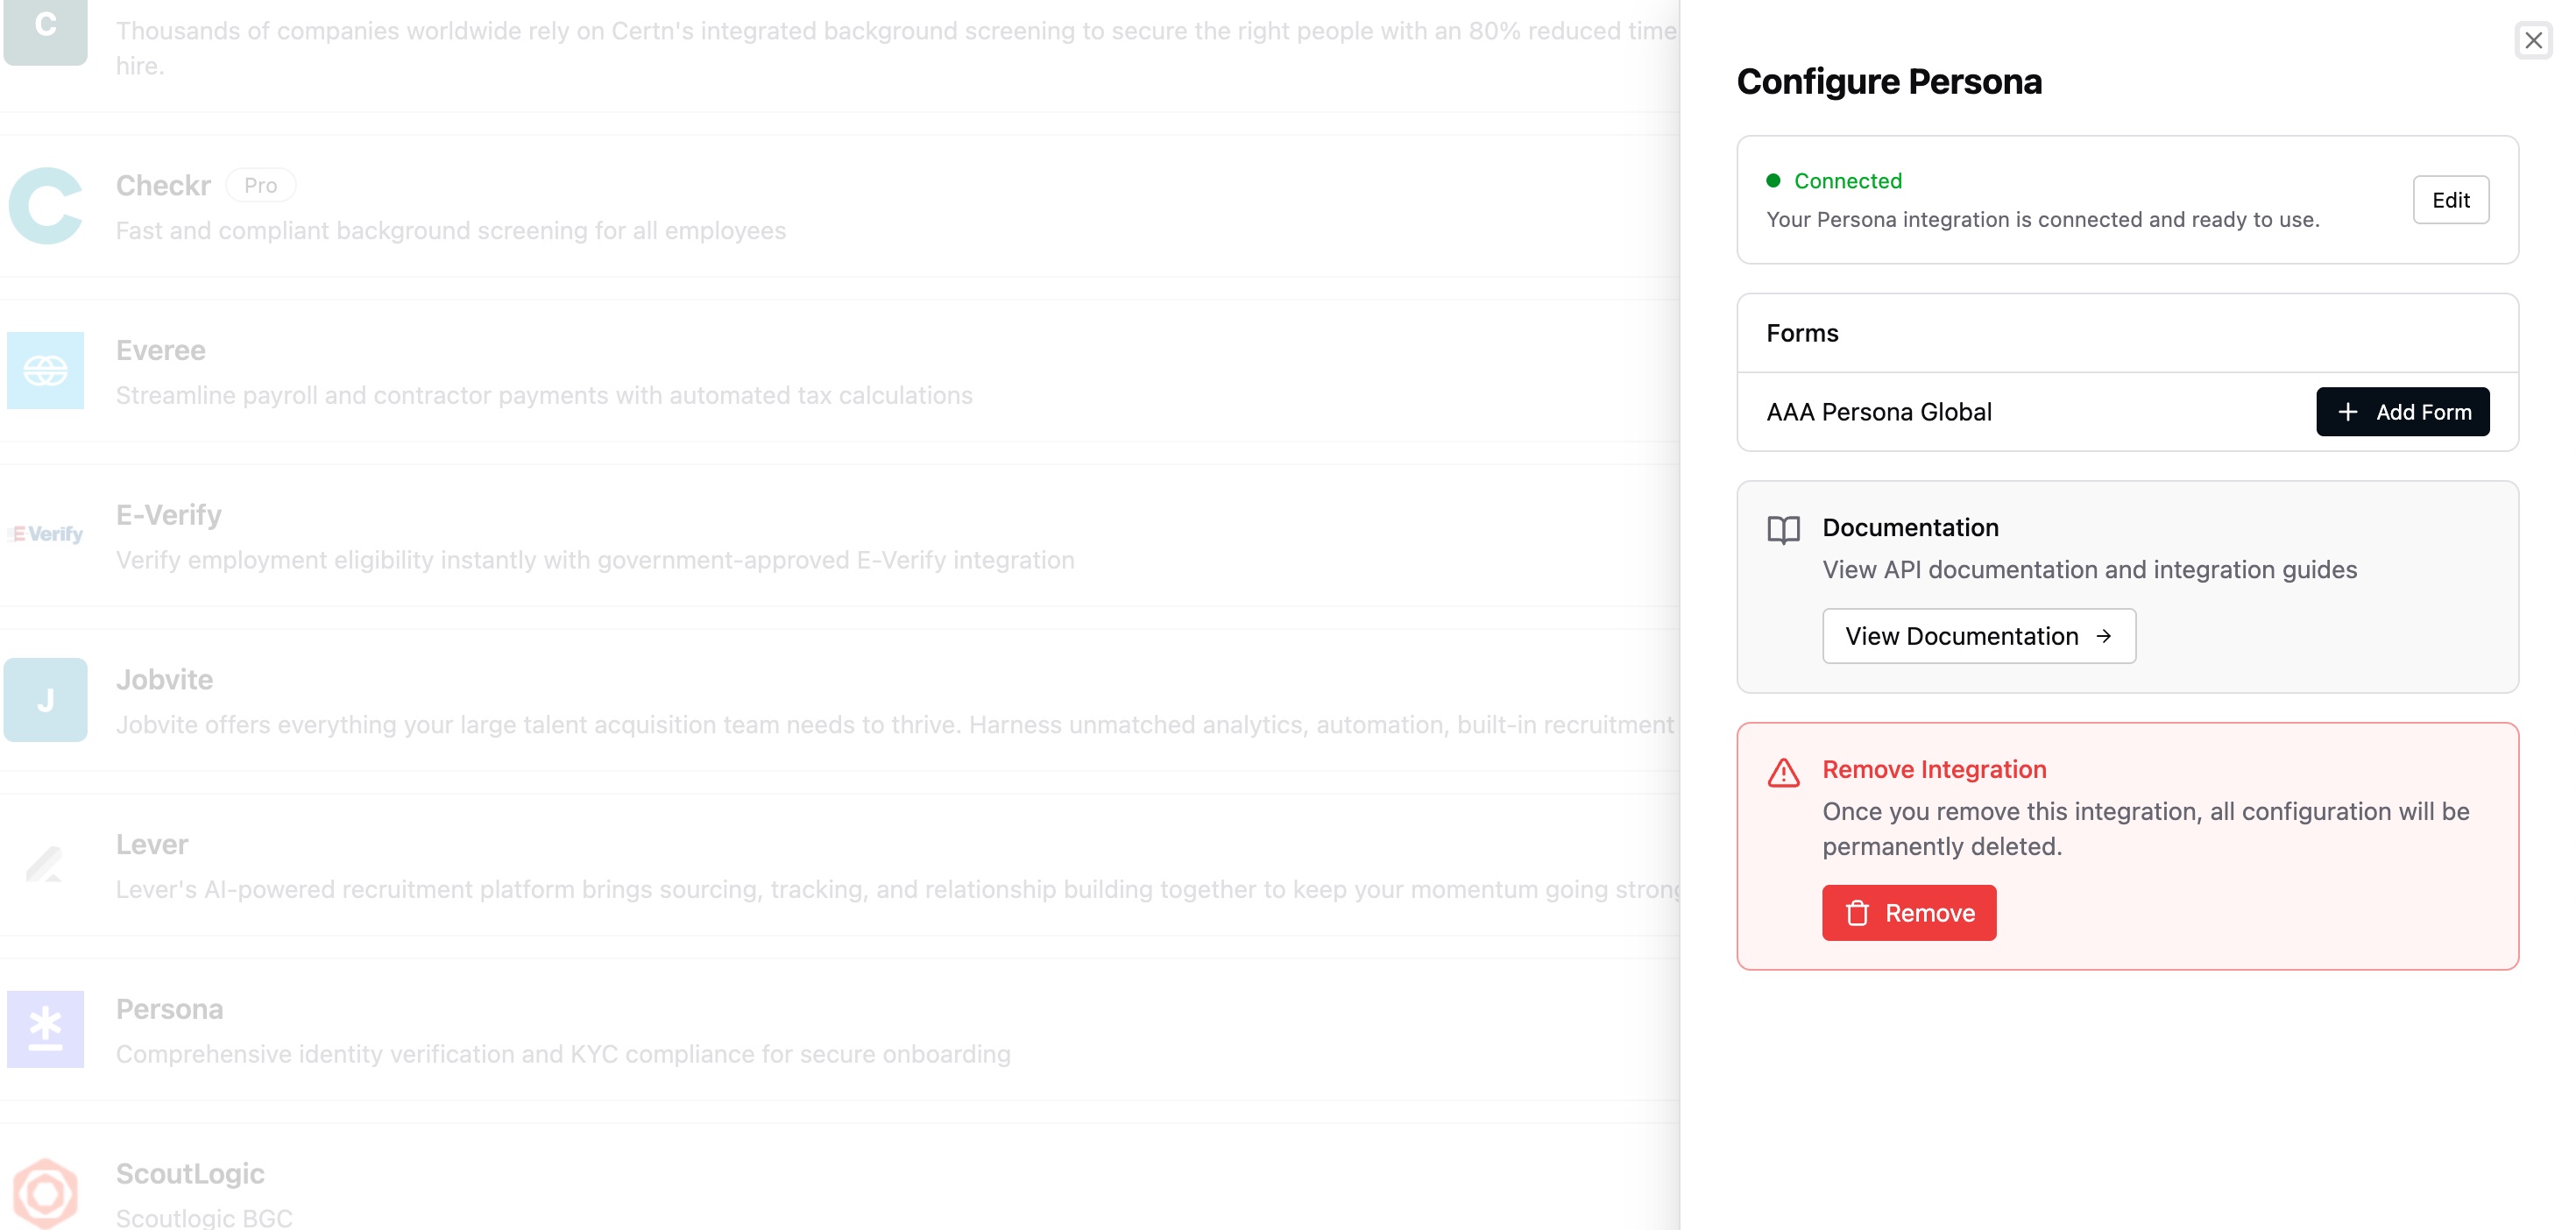
- Find the Persona card and click Configure
- Enter your Environment ID, API Key, and Webhook Secret
- Click Save — the panel should show "Connected"
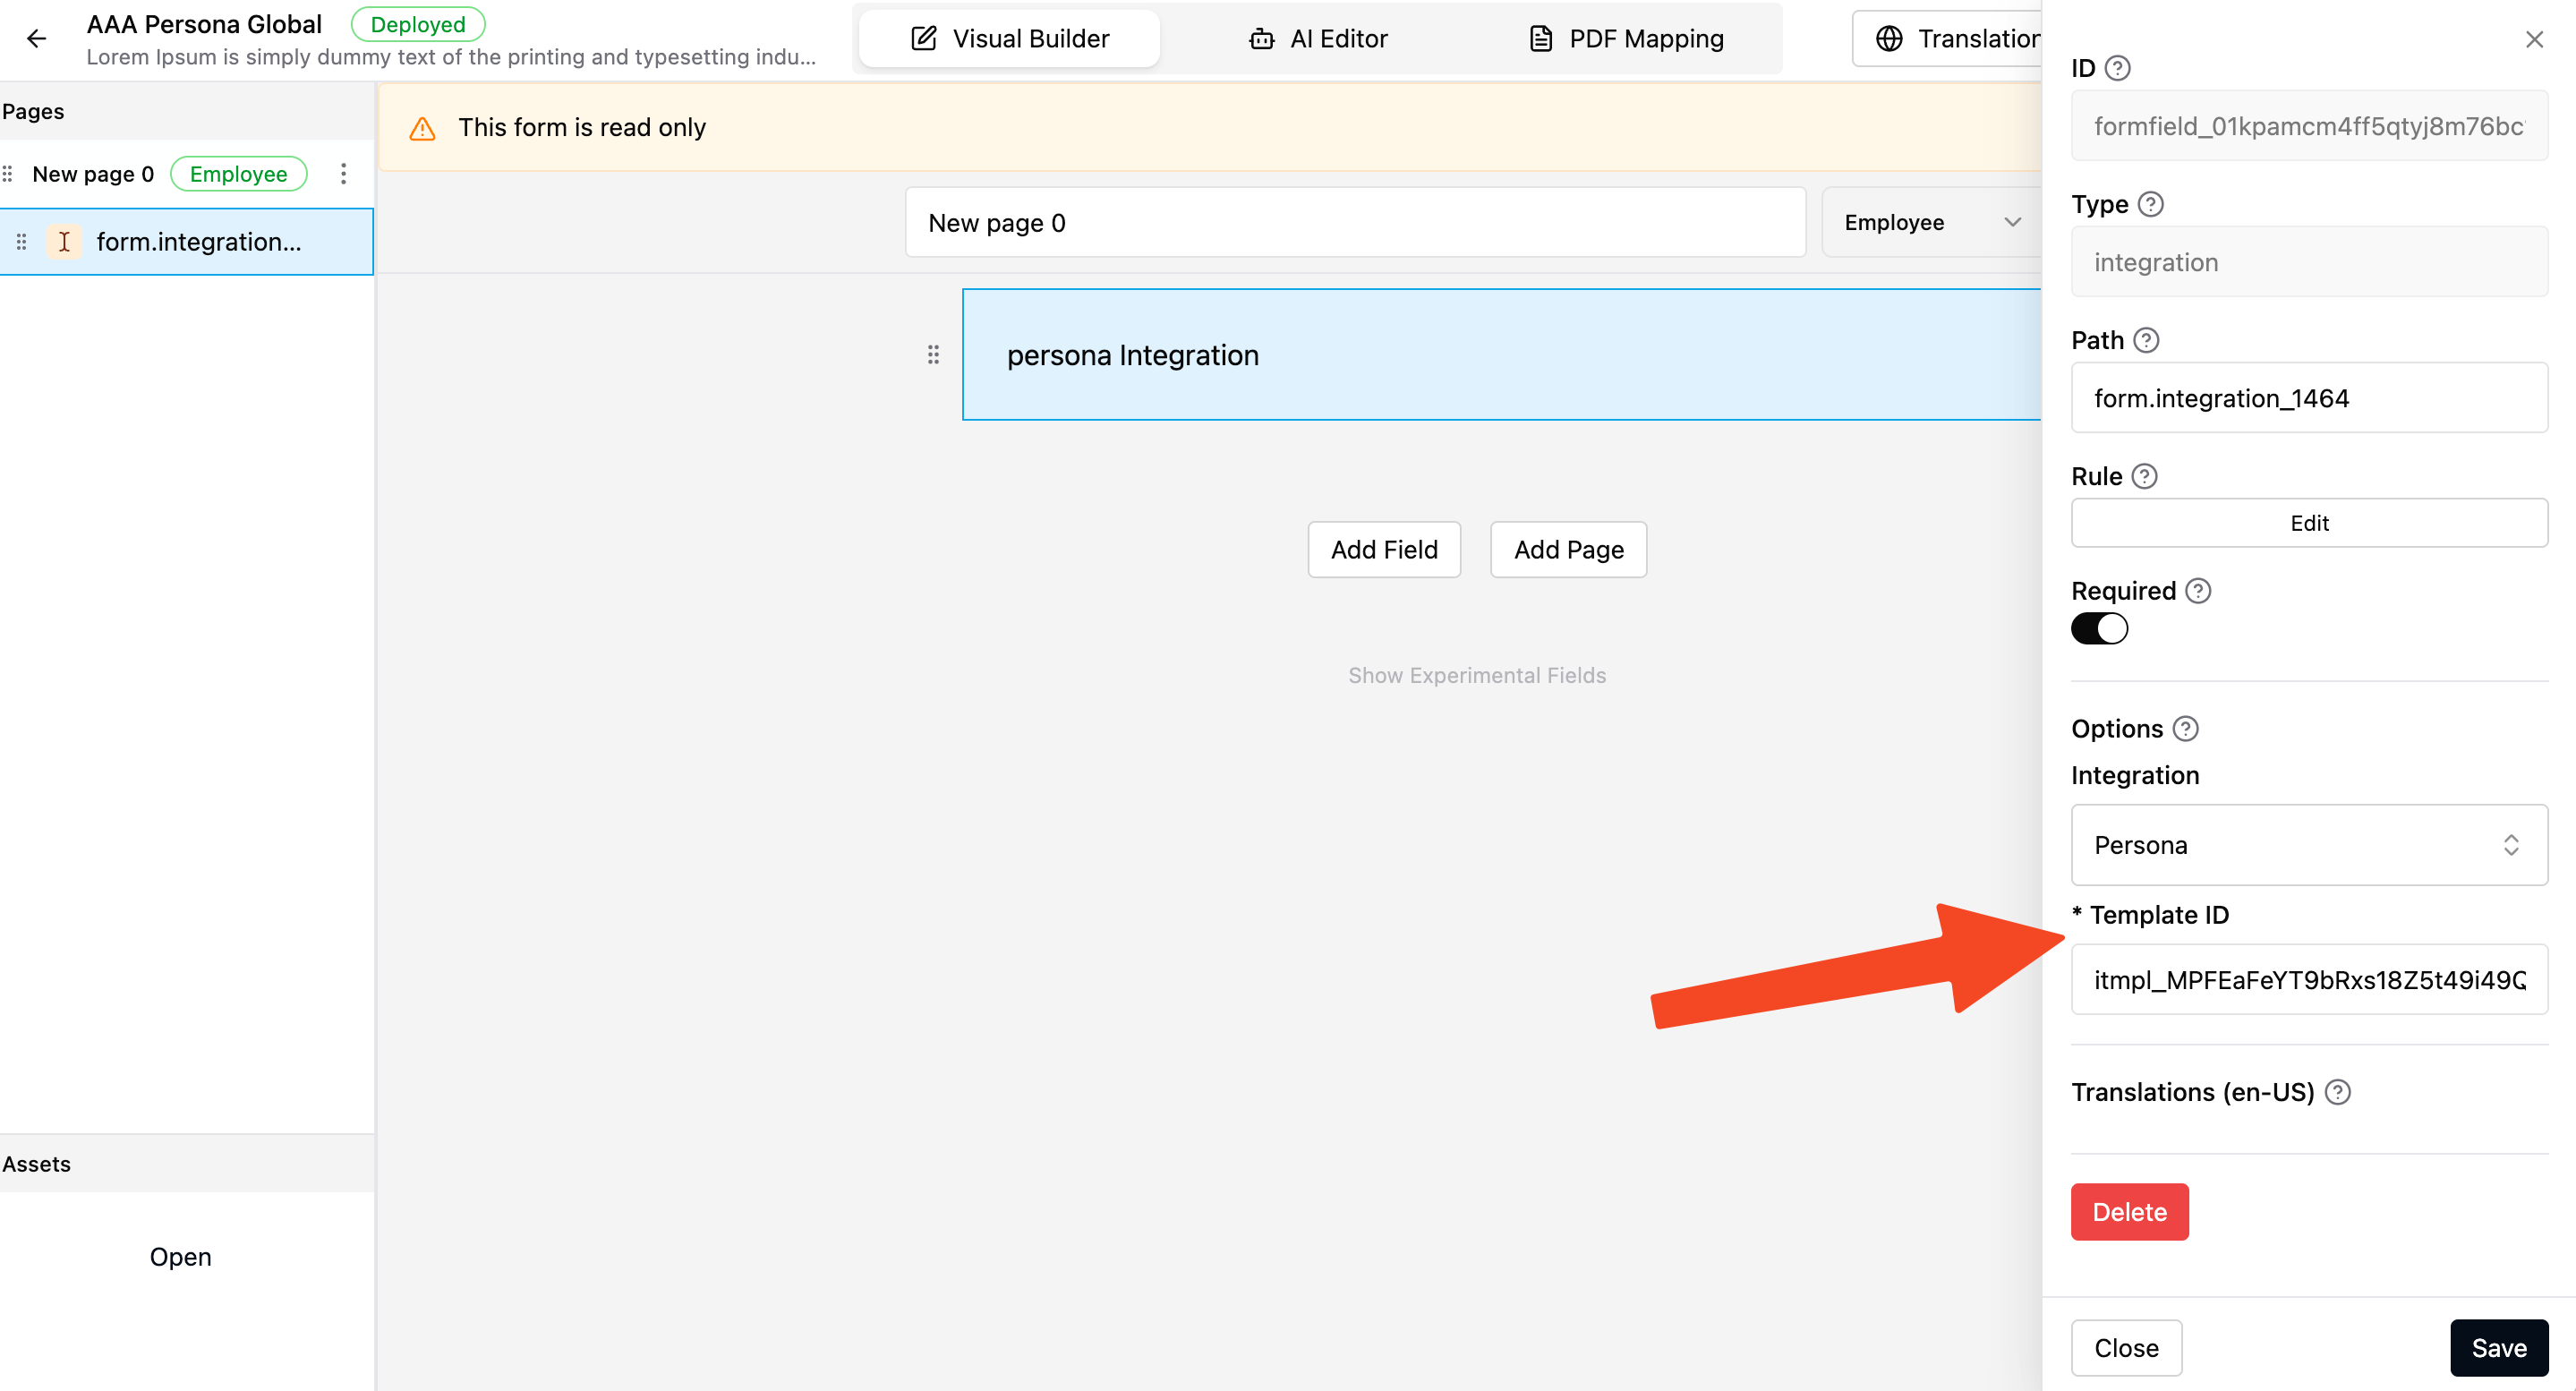
- Go to Forms > Form Library and create a new form (e.g., "Identity Verification")
- Add a Persona integration field
- In the field editor sidebar, paste the Template ID from Step 1
- Save the form
You can create multiple forms with different templates if you need different verification levels for different roles.
To automatically assign verification to every new worker, add the form to a Policy. Otherwise, you can assign it manually to individual placements whenever you need it.
Workers don't need to learn anything new. The verification flow appears as part of their regular onboarding tasks:
- They open their task in the worker portal
- The verification UI loads directly inside the task
- They follow the on-screen prompts — capture their ID, take a selfie if asked, and they're done
There's no separate account to create, no app to install, and no waiting. Persona processes the result in the background, and you'll see it on your end within seconds.

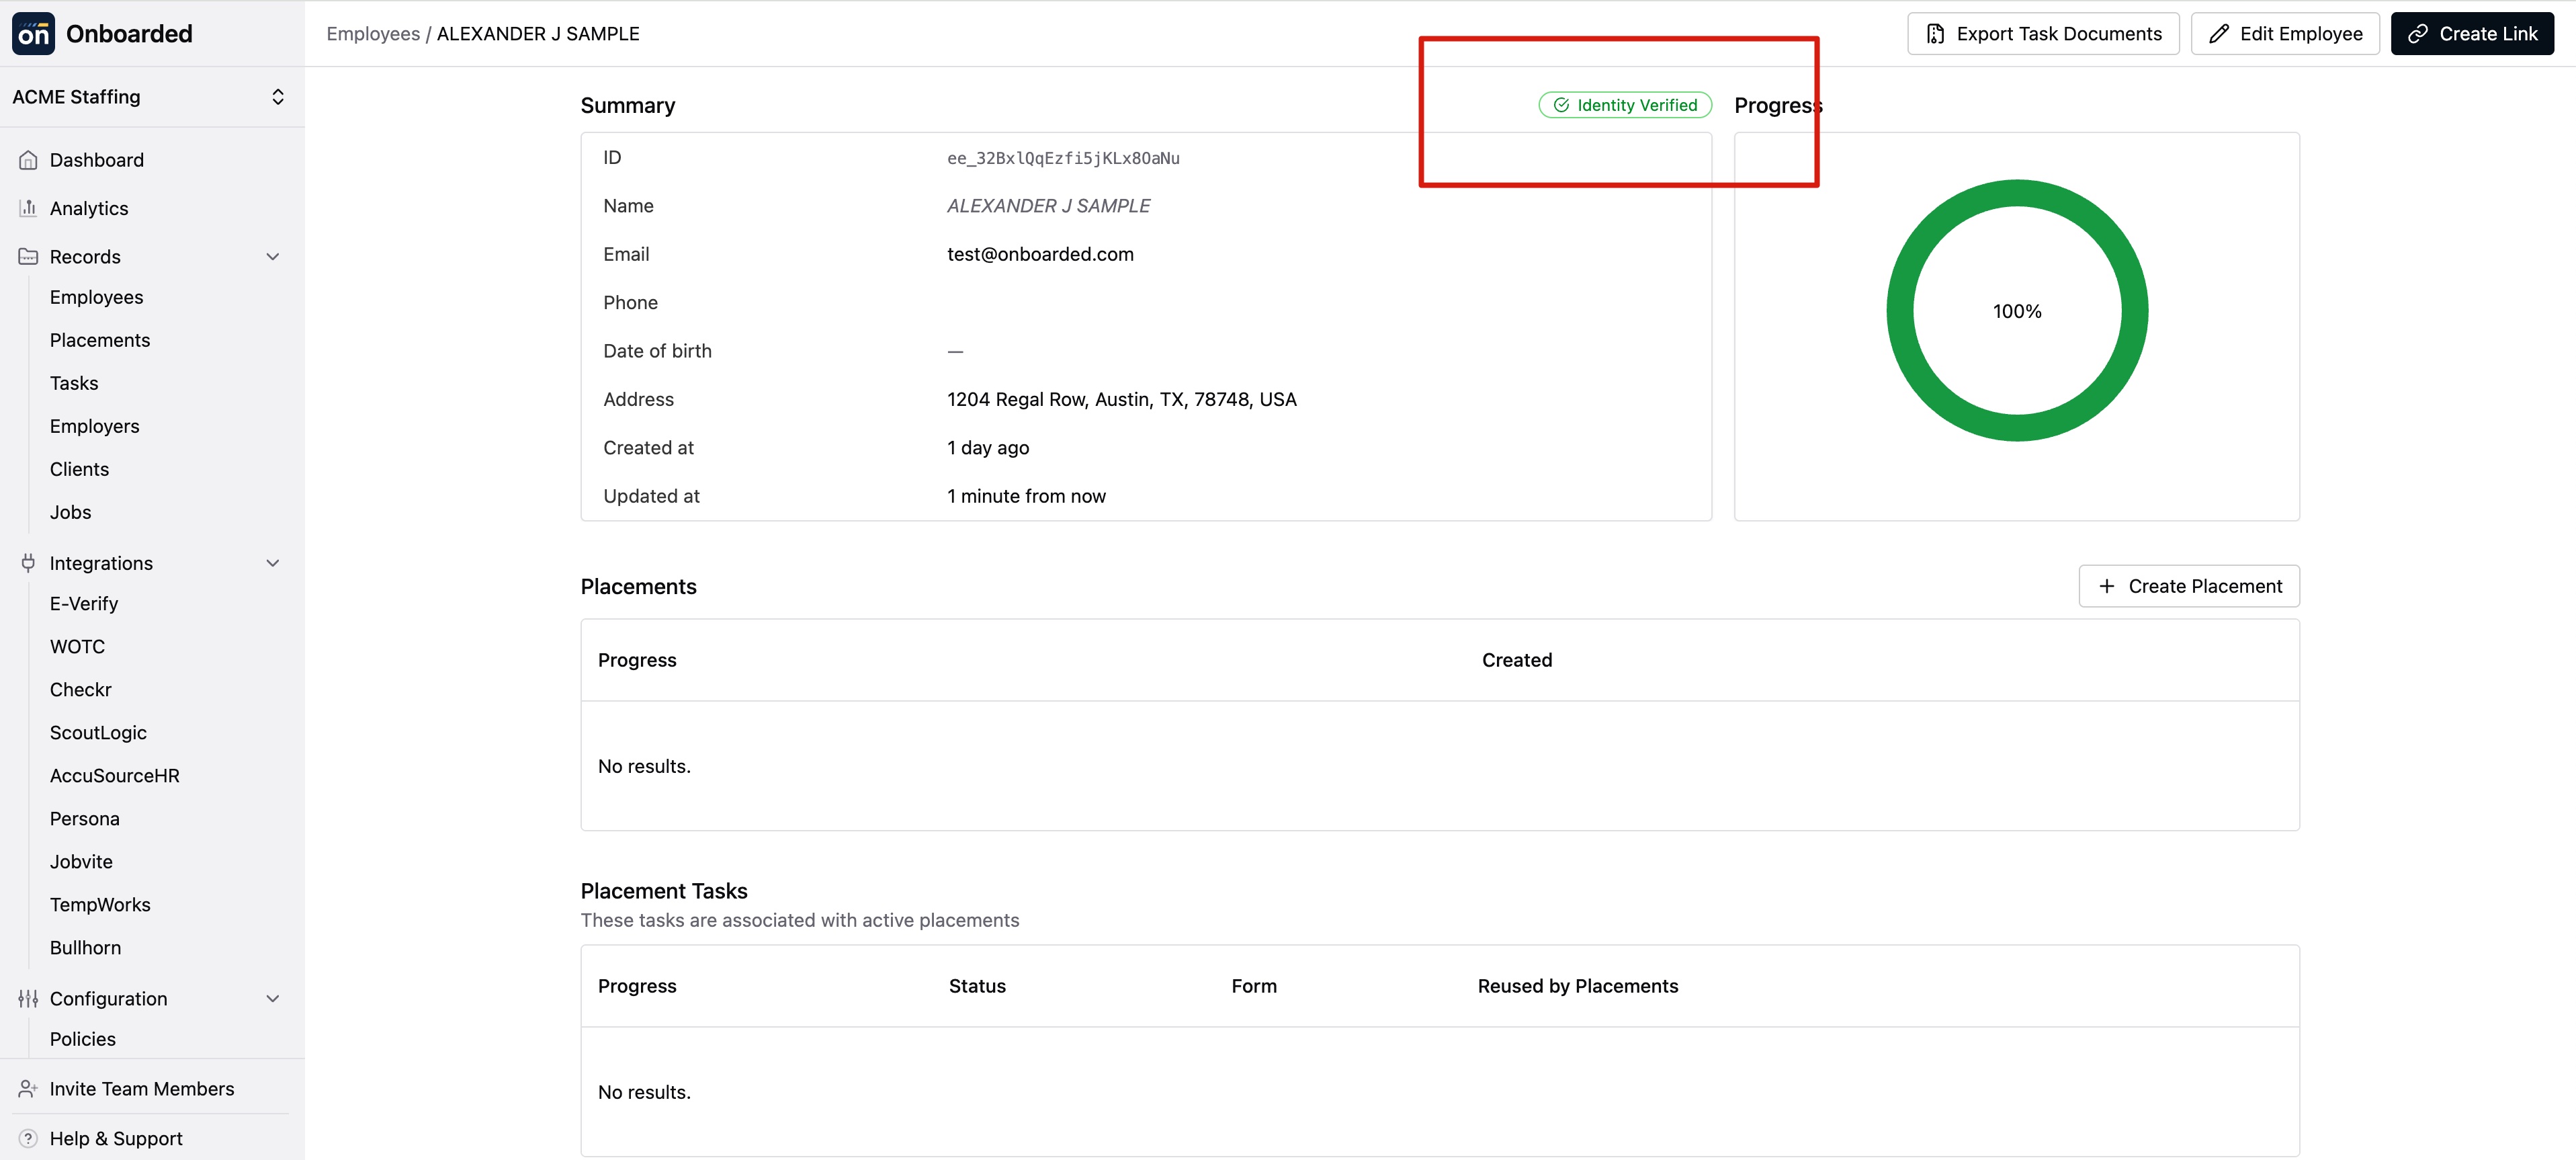
Once a worker completes verification, their employee detail page shows the outcome at a glance.
| Status | What it means |
|---|---|
| Identity Verified (green) | Identity confirmed — everything checks out |
| Pending (orange) | Still being processed |
| Failed (red) | Verification was unsuccessful — may need a retry |
| Expired (gray) | The ID document itself has expired |
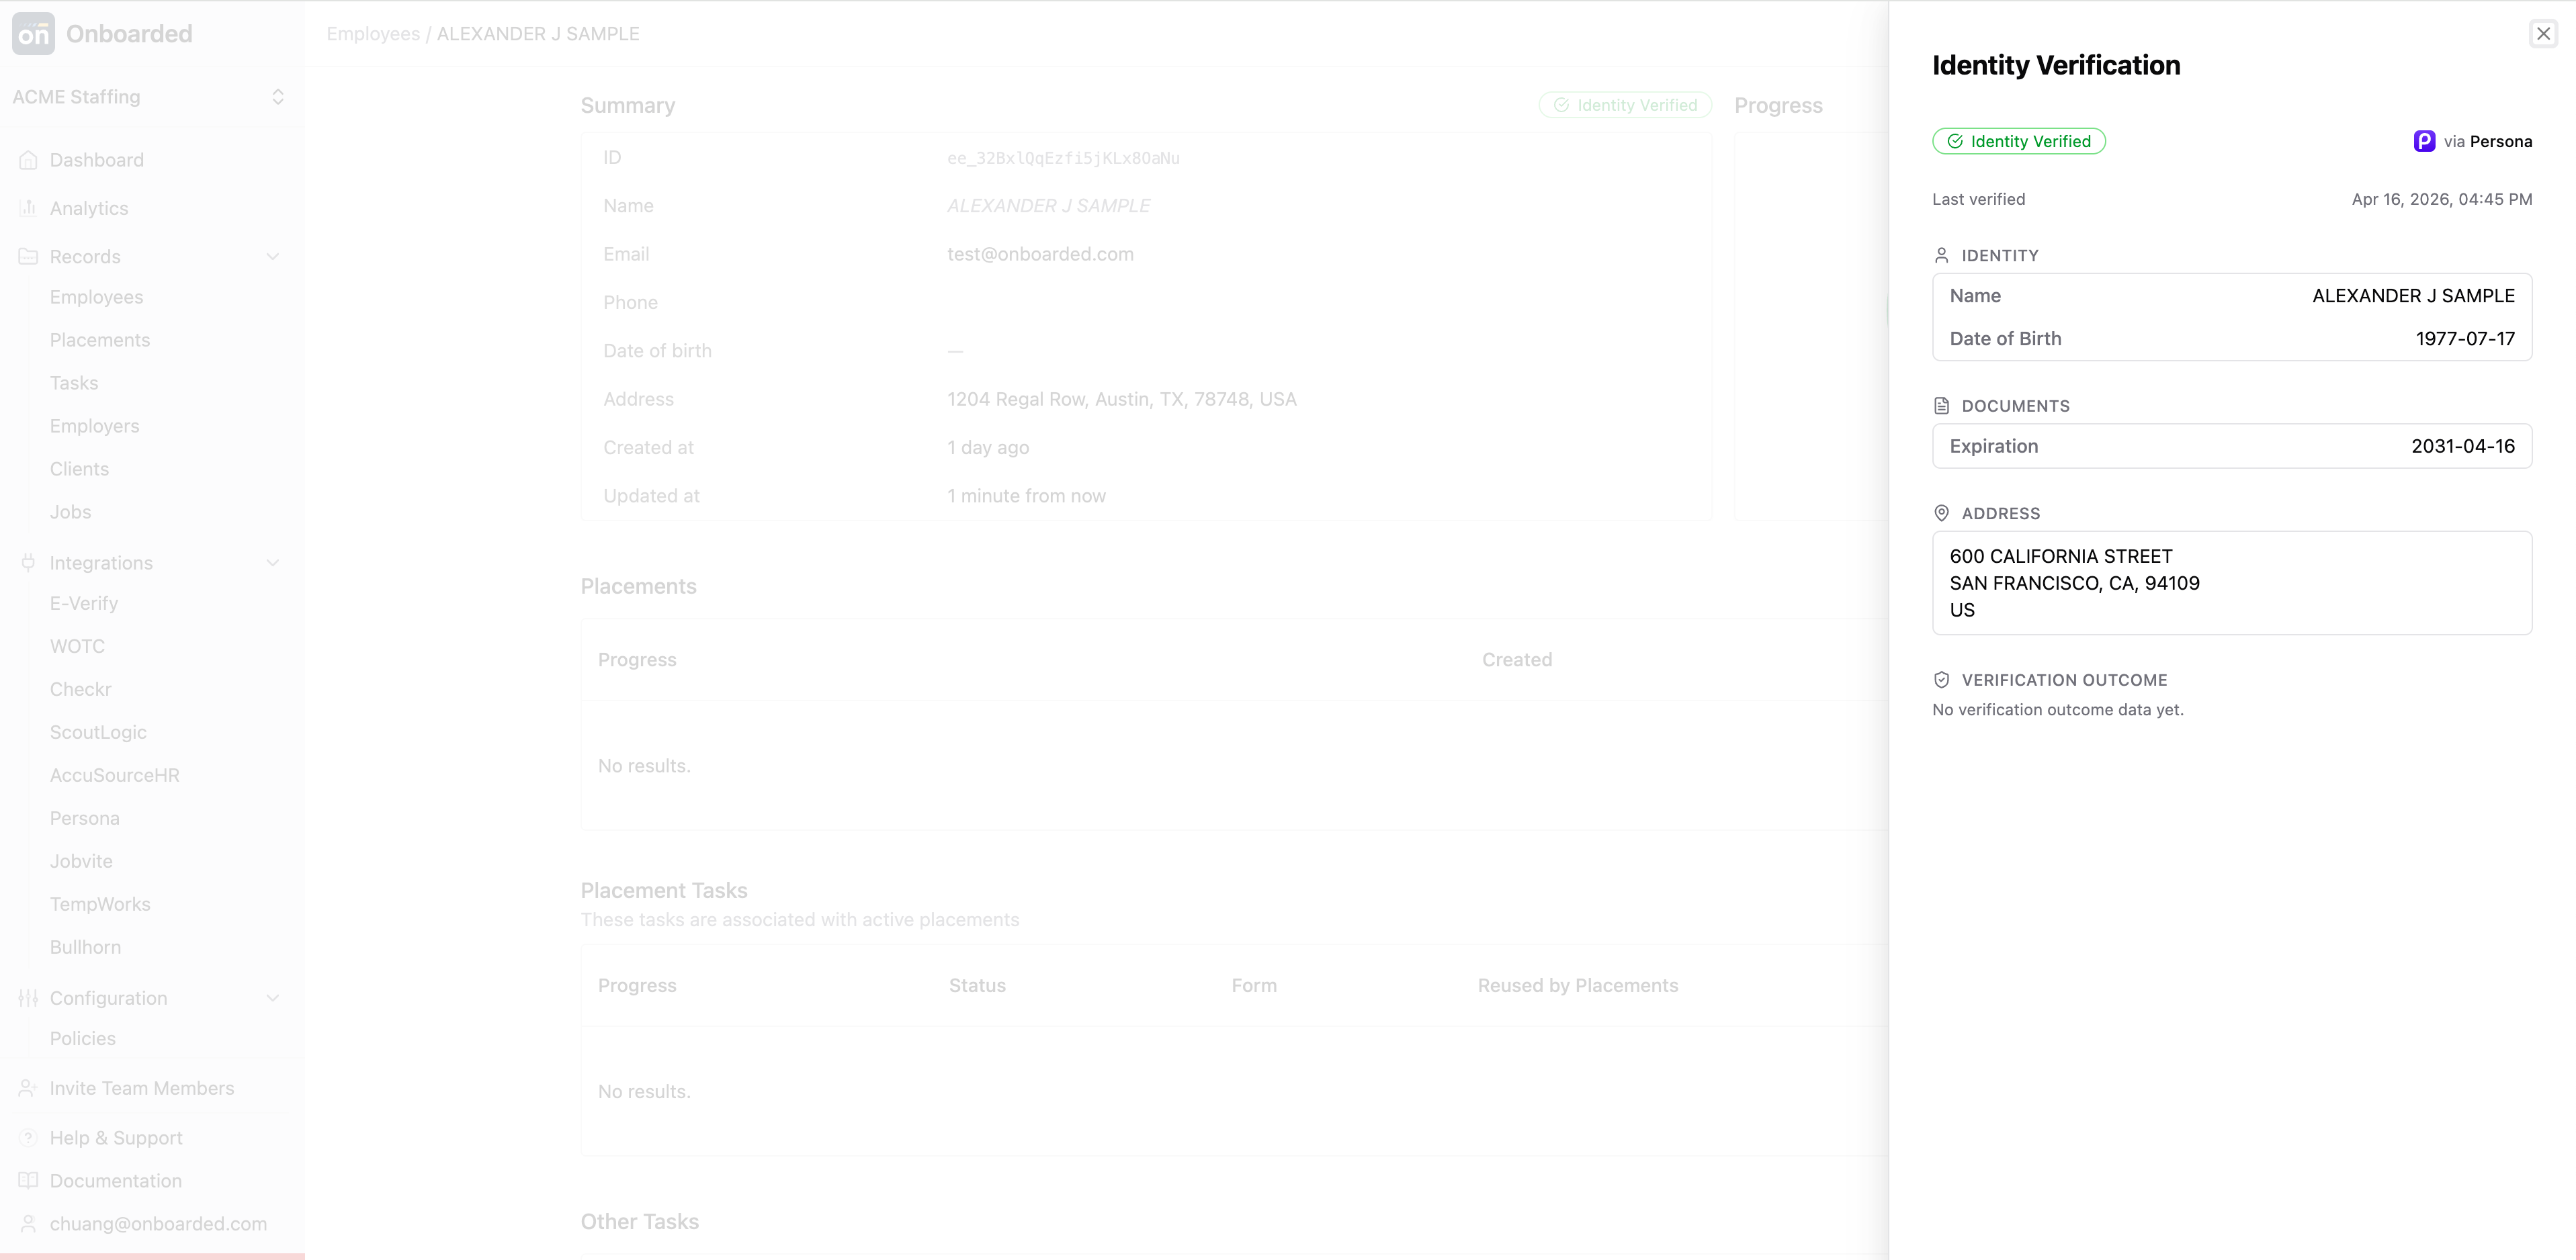
Click the status badge to see everything Persona extracted: name, date of birth, nationality, document details, address, confidence scores, and face/liveness match results.
Some fields may show "No data collected yet" depending on the template — for example, a document-only template won't have a selfie match result.
This is where identity verification really pays off. Onboarded automatically compares the data from the worker's ID against their compliance forms (I-9, W-4) and flags anything that doesn't match.
The comparison runs both ways:
- When a worker completes verification → checks against any forms already submitted
- When a worker submits a form → checks against any existing verification
So it doesn't matter which task the worker completes first — discrepancies are always caught.
| Severity | What it means | Example |
|---|---|---|
| Critical (red) | Needs immediate attention | Date of birth on the ID doesn't match the I-9 |
| Warning (orange) | Likely a typo or minor difference | "Mike" on the ID vs. "Michael" on the I-9 |
| Info (blue) | Data is missing on one side | ID has a date of birth but the I-9 hasn't been submitted yet |
If a worker fixes the issue themselves — say, they resubmit their I-9 with the correct spelling — the system re-runs the comparison automatically and resolves the event. You'll see it marked as "Auto-resolved: data now matches". No manual work on your part.
When an event does need your attention:
- Open the employee's detail page and click the status badge
- Find the unresolved event
- Click Resolve and enter a brief reason (e.g., "Nickname vs. legal name — confirmed acceptable")
- Click Confirm
Resolved events stay in the record for audit purposes.
What if the worker hasn't submitted their I-9 yet? Cross-referencing still works — it compares against pre-filled profile data. When the actual form comes in later, the comparison runs again automatically.
Can a worker redo verification? Yes. The new result replaces the old one, and any stale risk events are auto-resolved if the new data matches.
What if verification fails? You'll see a "Failed" status on the employee page. You can coordinate with the worker to retry.
Are risk events visible to workers? No — only administrators see risk events on the employee detail page.
When does a verification expire? Based on the ID document's own expiry date. If there's no known expiration, the verification stays valid.
Can different roles have different verification levels? Yes. Each form specifies its own Persona template, so you can require document-only for some roles and full liveness checks for others.