By default, dashboard users can access all core entities from the left navigation menu. They can also view policies, forms, integrations, and settings. However, not all customers make use of all the core entities. Additionally, not all dashboard users need access to every page in the menu. Onboarded allows customers to customize the top-level pages for each dashboard user based on their user group memeberships. Furthermore, customers can create data views with built-in filters and assign them to specific user groups. These data views can serve as both shared bookmarks and access control to limit the displayed content.
Most accounts have a navigation menu that contains all the default entities as shown below.

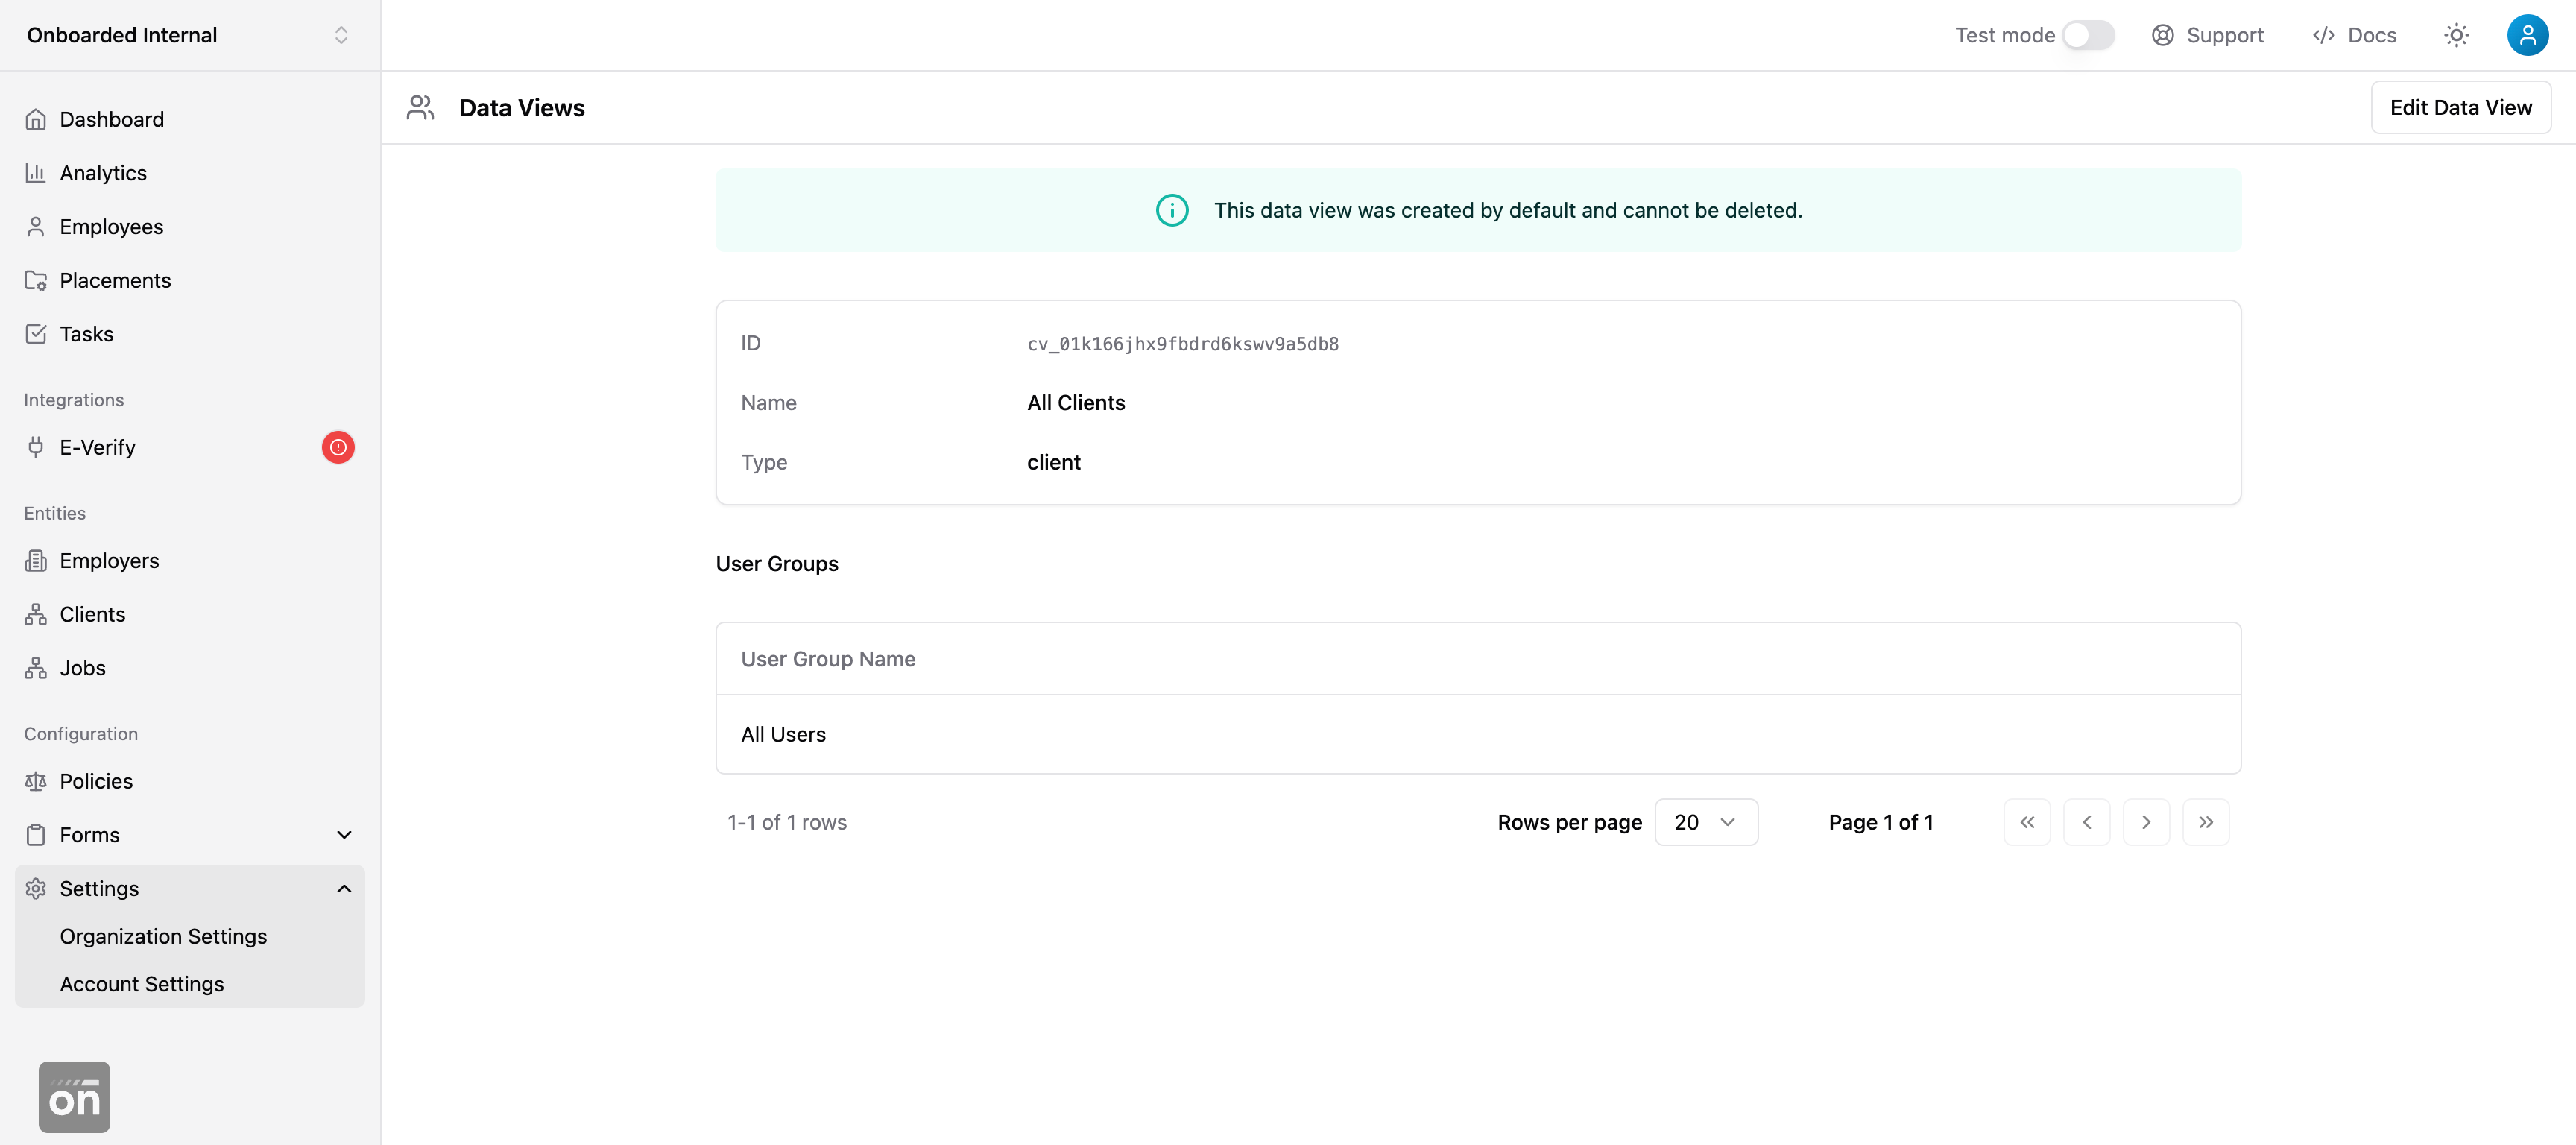
Customers can change the menu content by going to "Data Views" in "Account Settings". This page shows all the default views that correspond to the different tabs in the navigation menu. Click on the view that you want to remove from the navigation menu to go to the details page (shown below)
Then click on the "Edit Data View" button on the top right corner to edit the data view access. You can, for example, remove everyone's access to the page by removing the "All Users" group from the access list (as shown below).
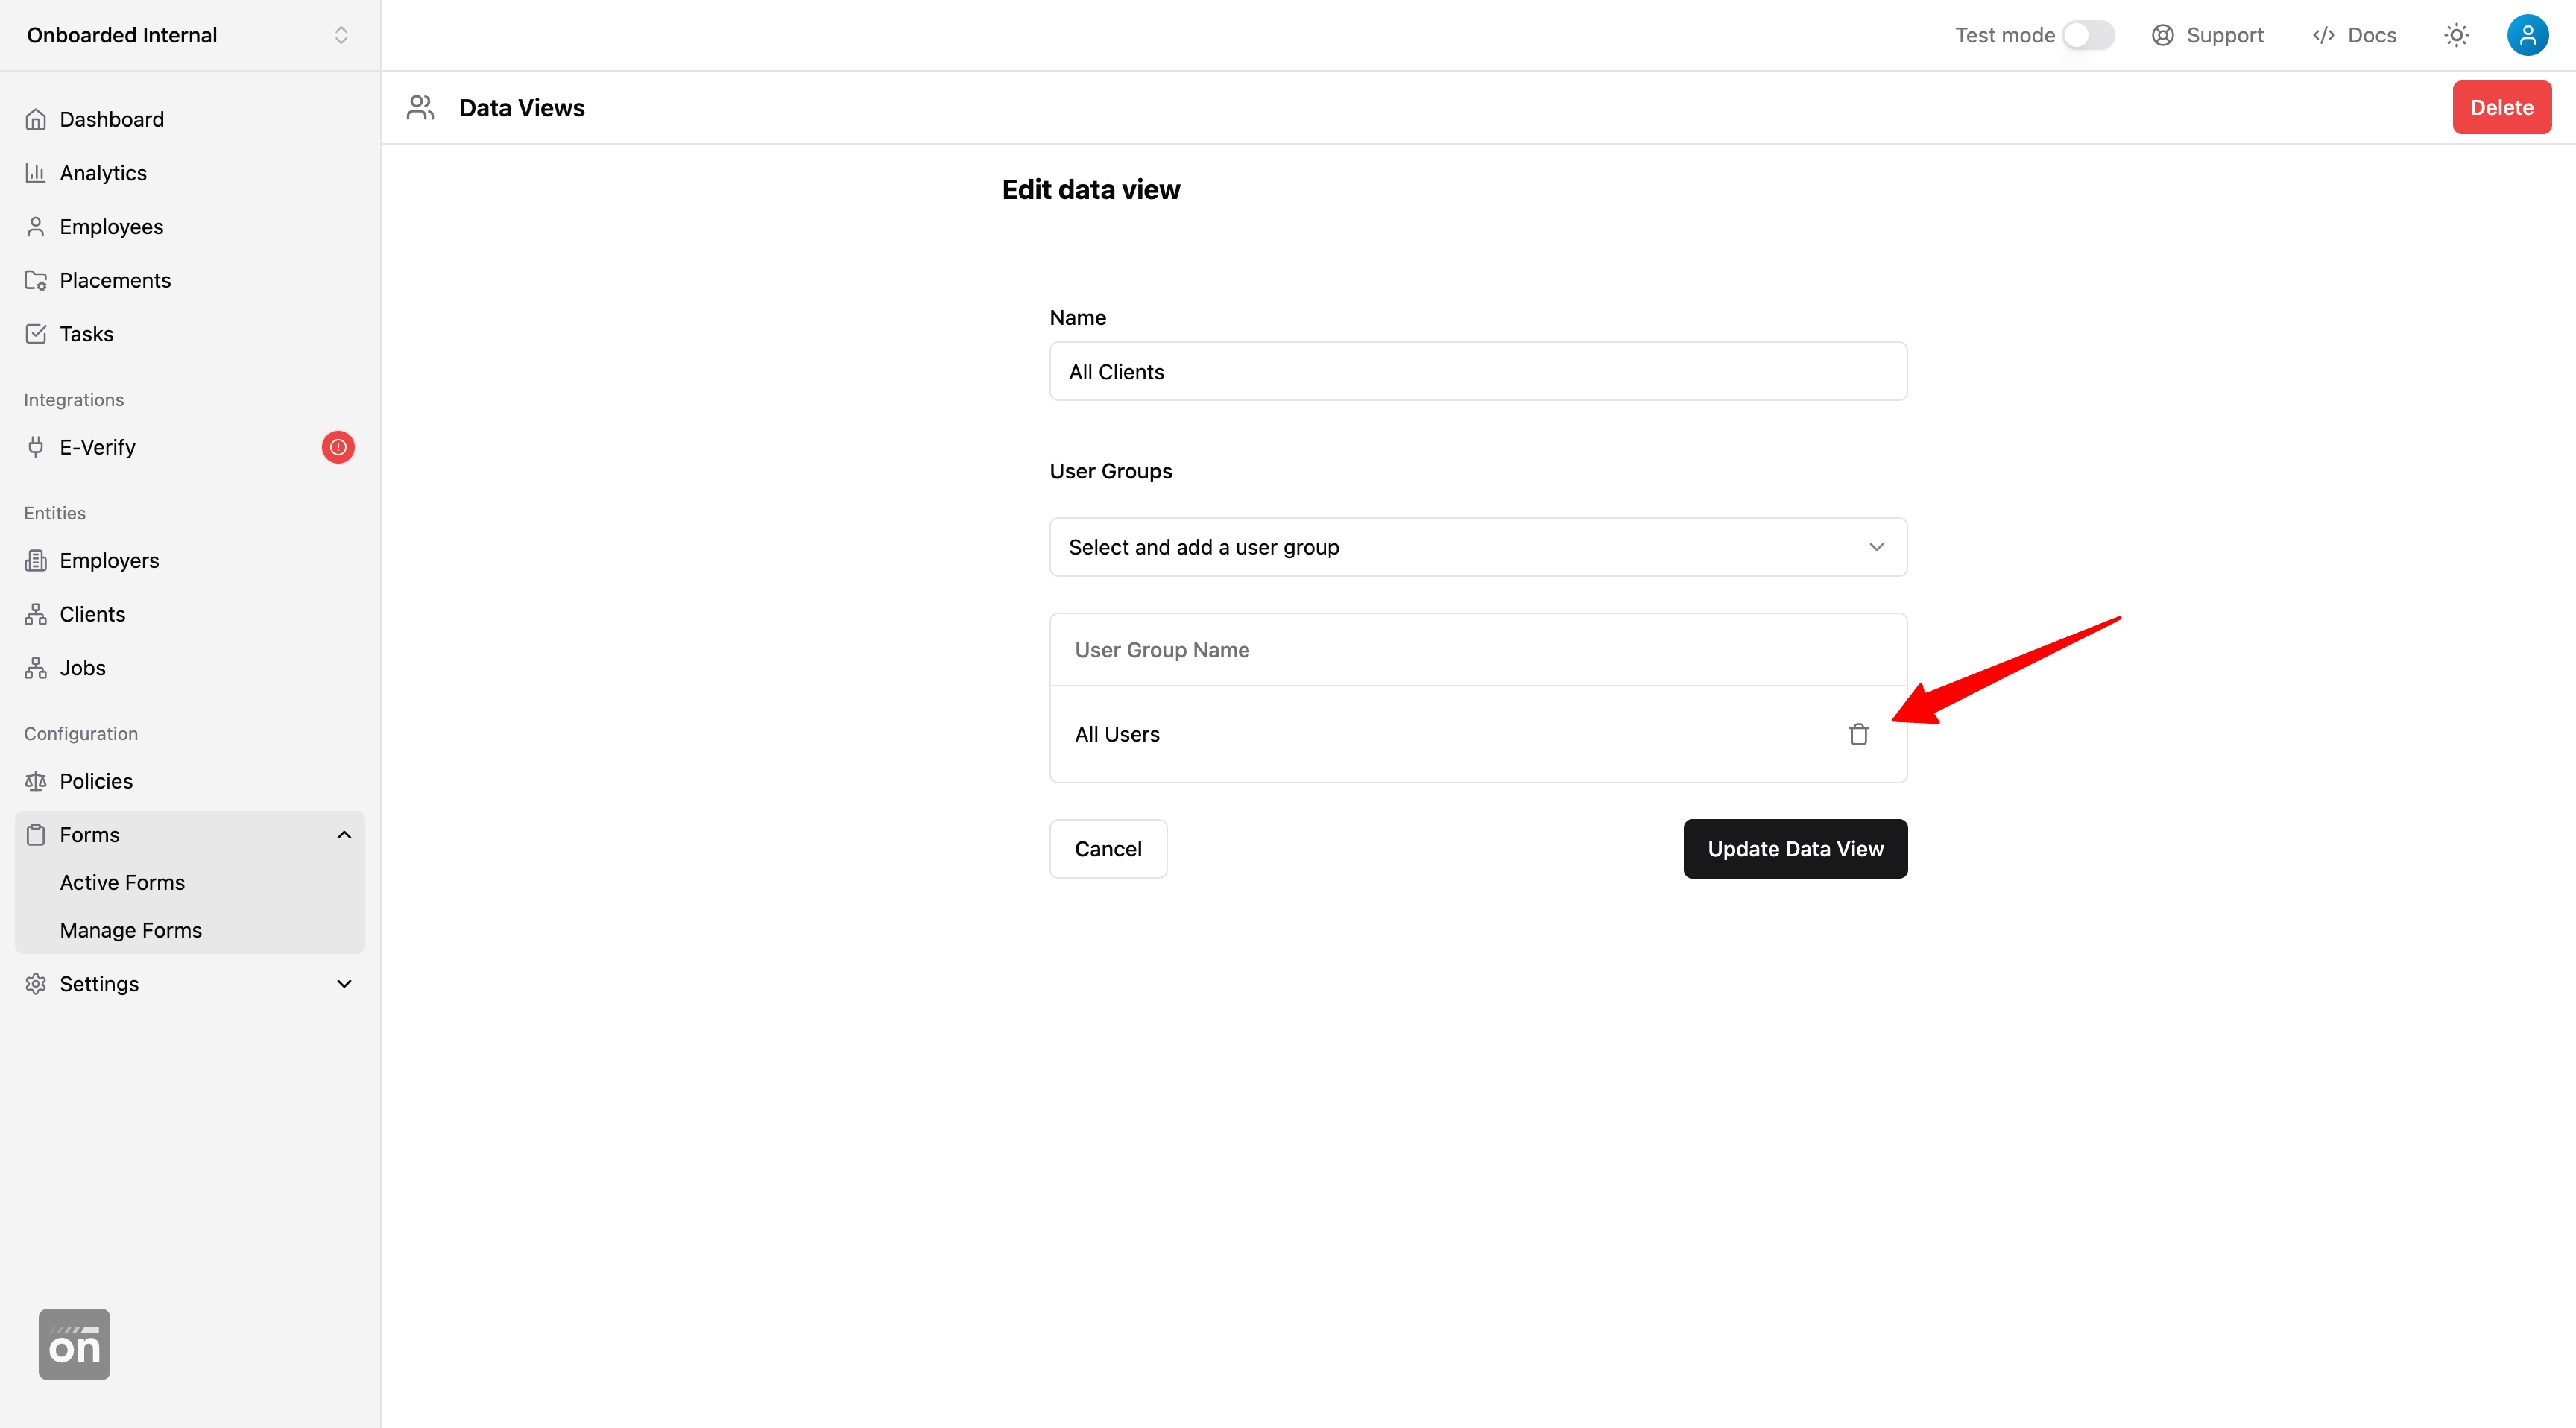
Alternatively, you can also replace the "All Users" group with a different, more restricted group - so that only a subset of users have access to this view.
Once you are done with updating the user groups, users who no longer have membership from any groups with access to the view will no longer see the tab in their navigation menu.
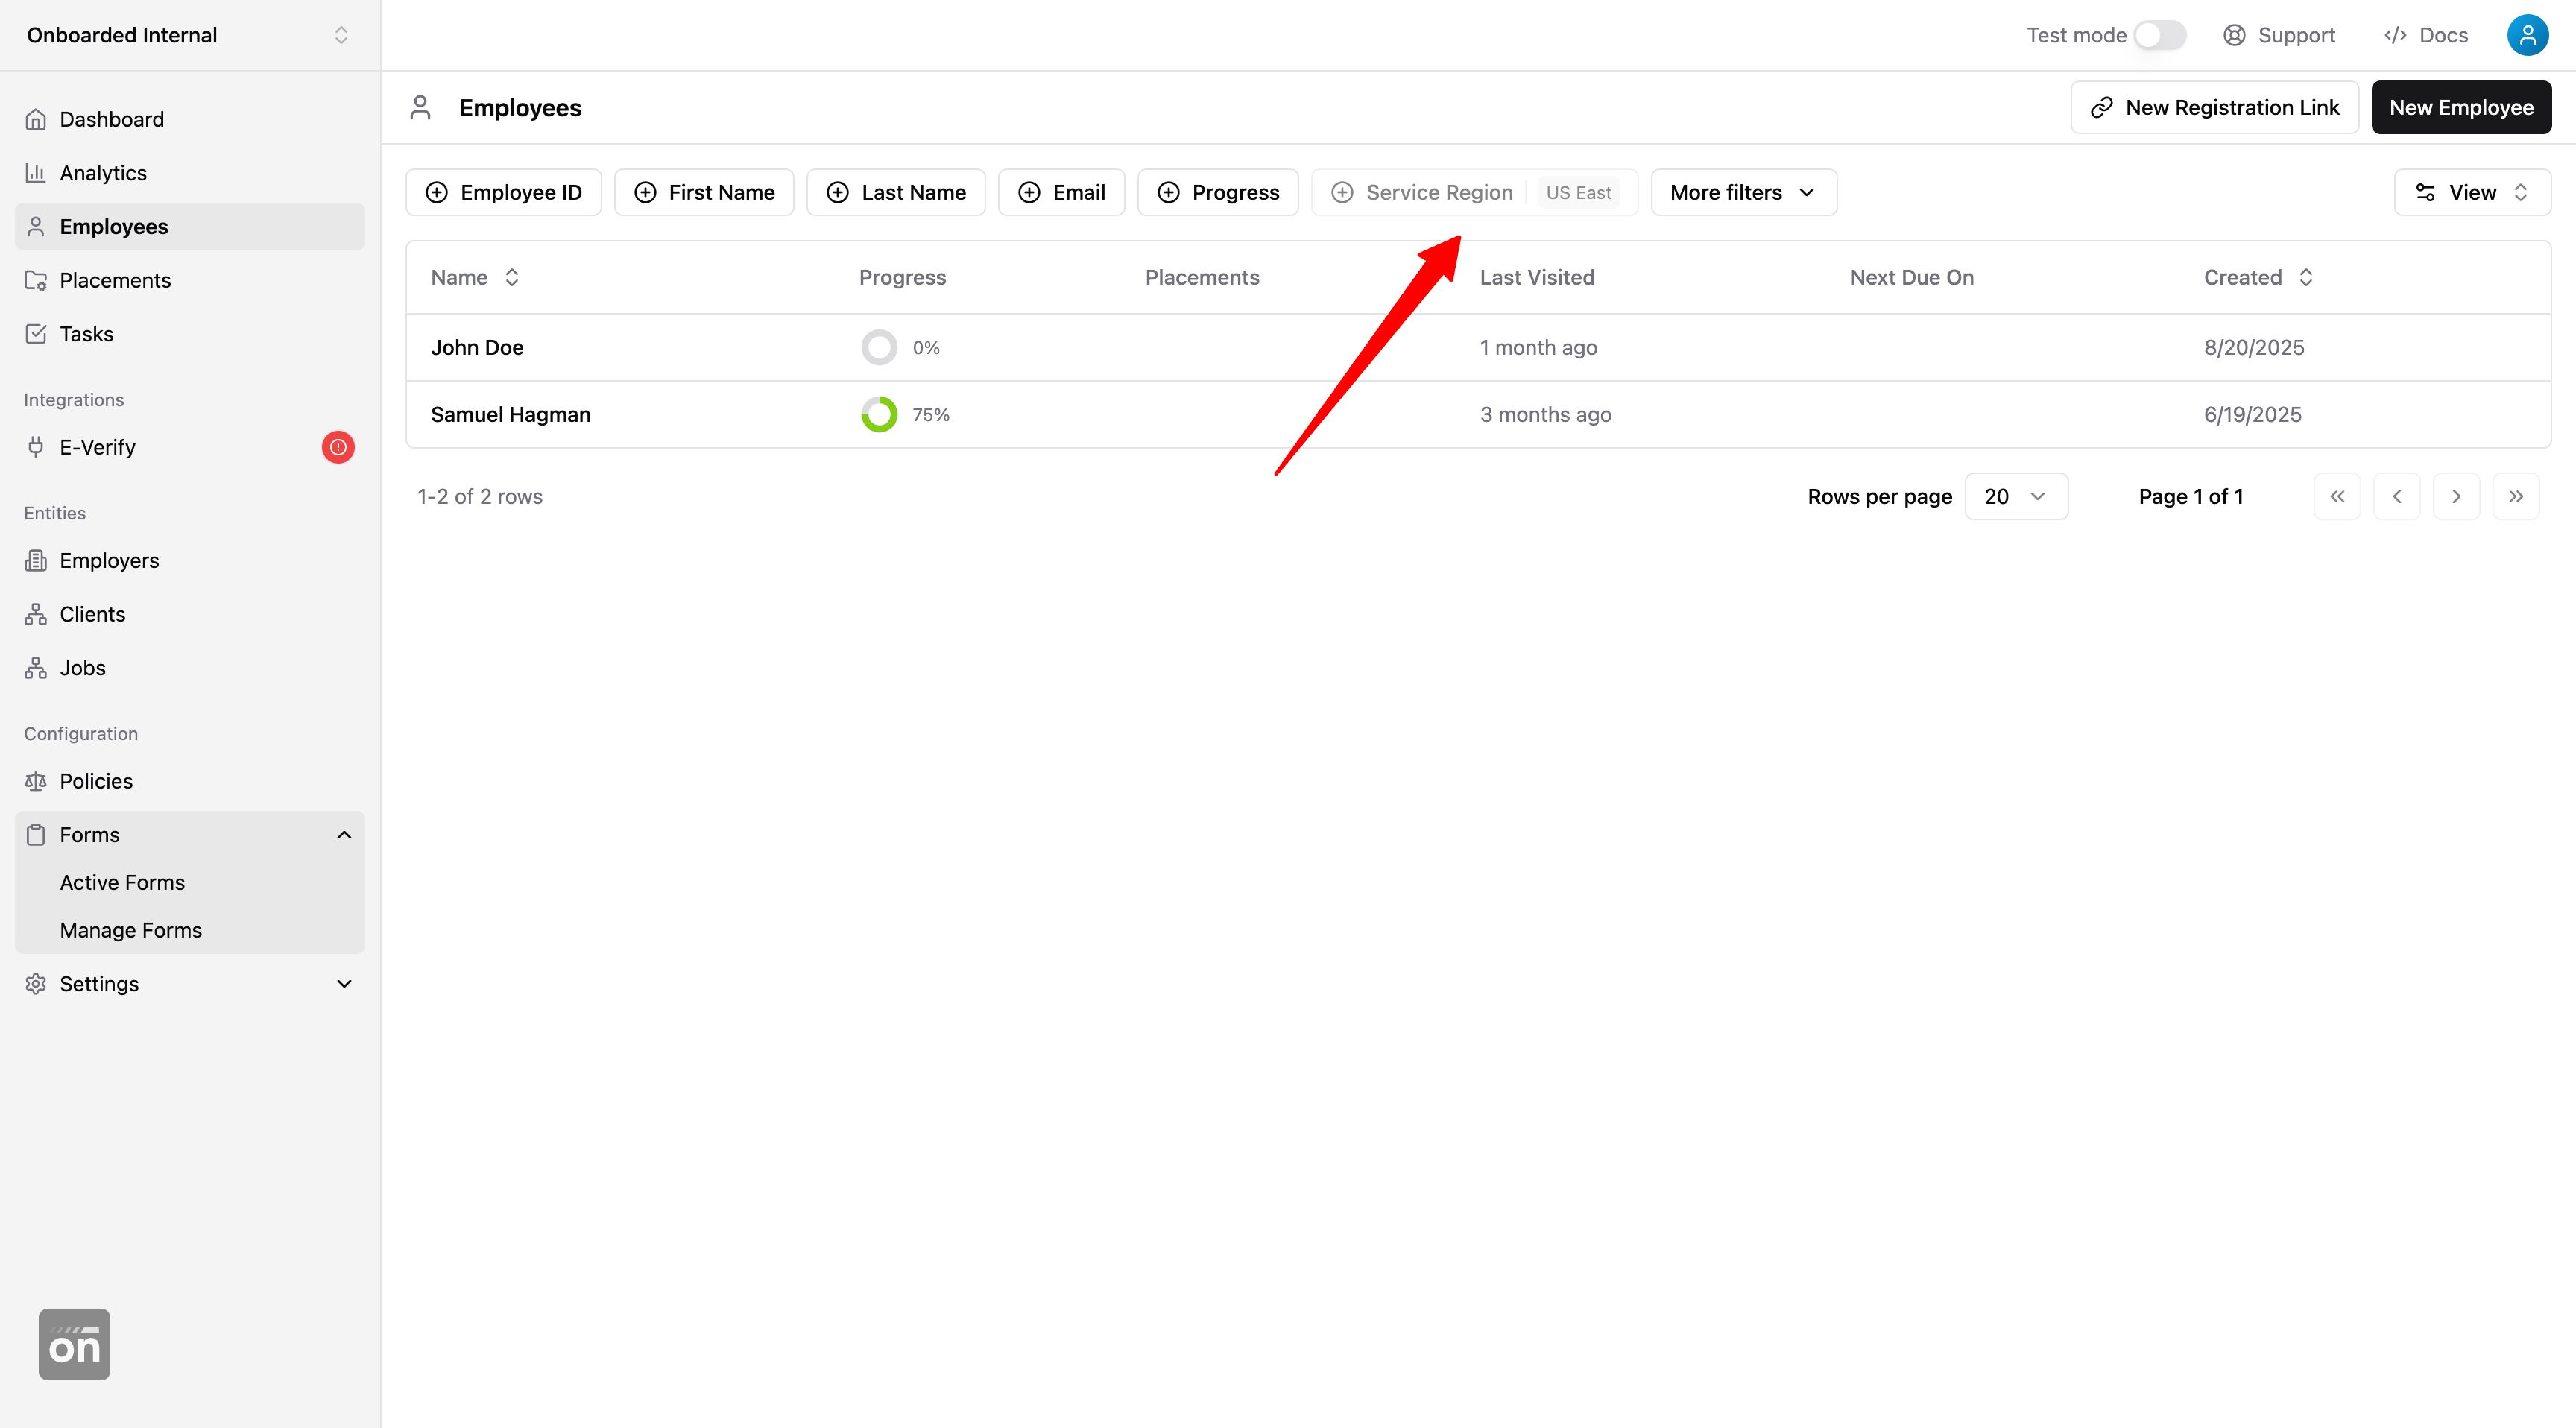
Sometimes users may need access to some employees but not others. For example, a national employer may have different service regions that operate independently from each other. Onboarding admins who operate in "US East" may not need access to employees from the West Coast. For use cases like this, customers can create data views with built-in service region filter to replace the default employee view.
Start by going to the default employees view, apply the desired filter, then click on "Create View" (as shown below).
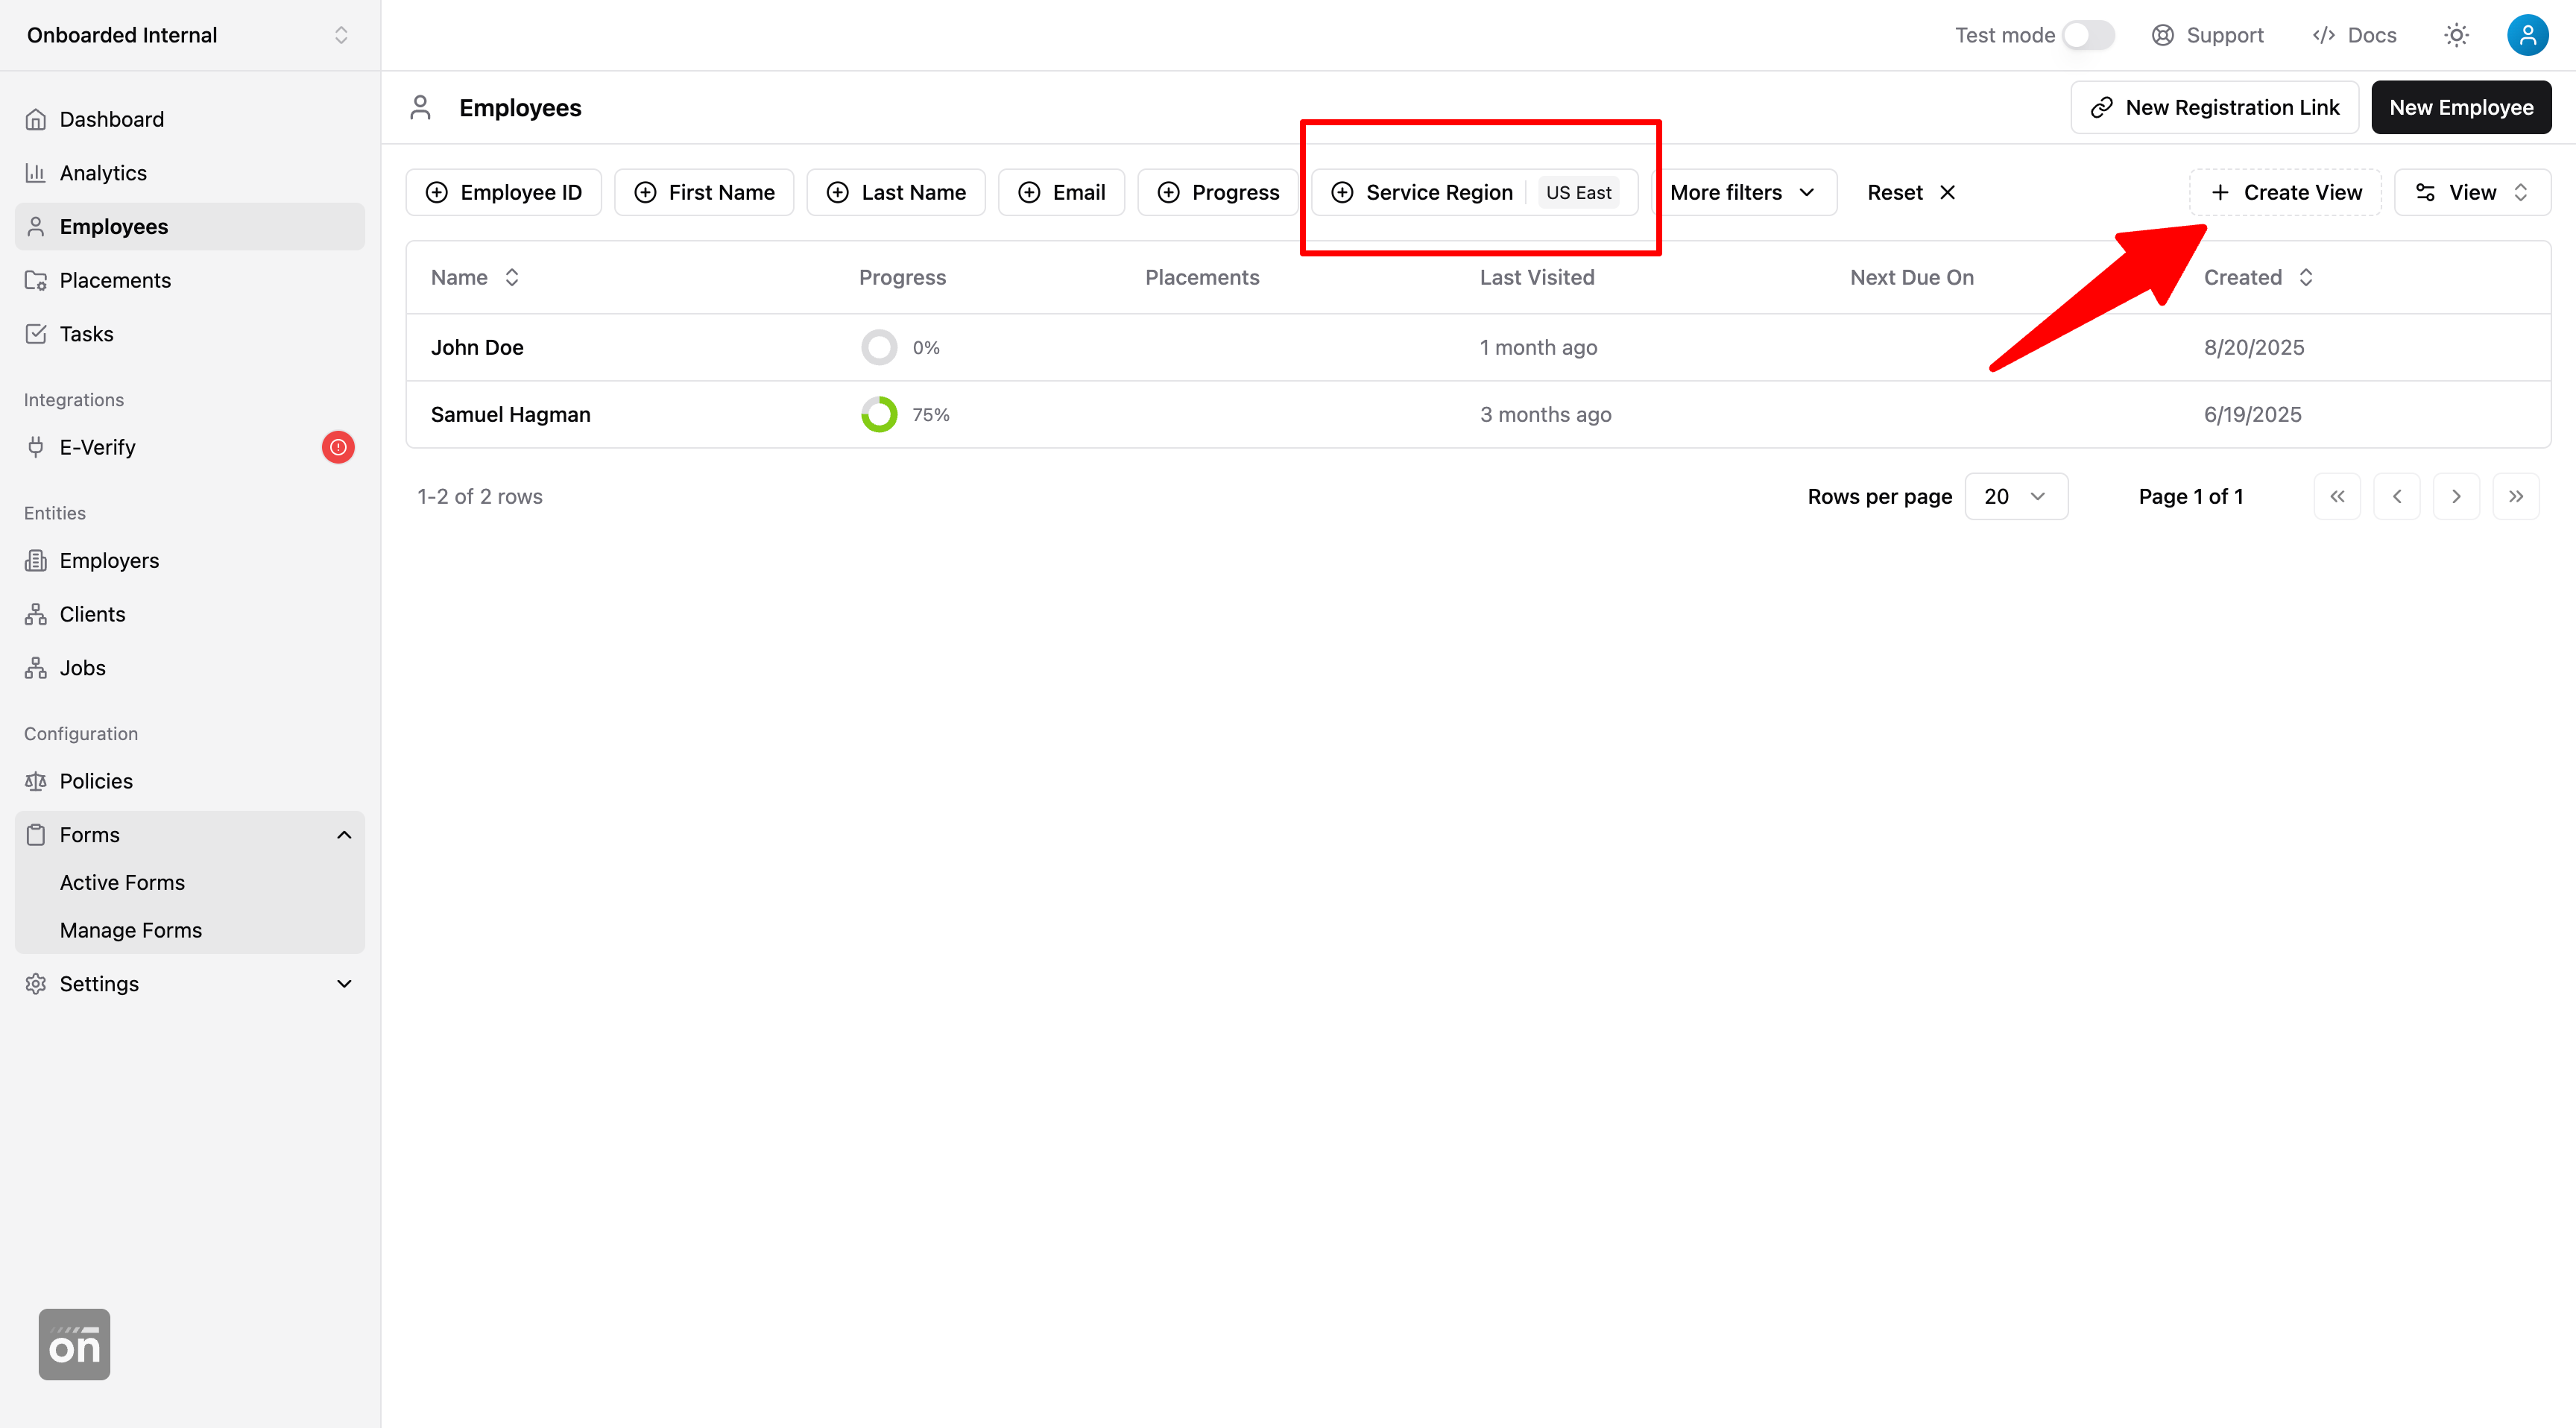
If you're not seeing the "Create View" button, be sure that you are filtering by at least one attribute. The button to create a view will appear when the filter is applied.
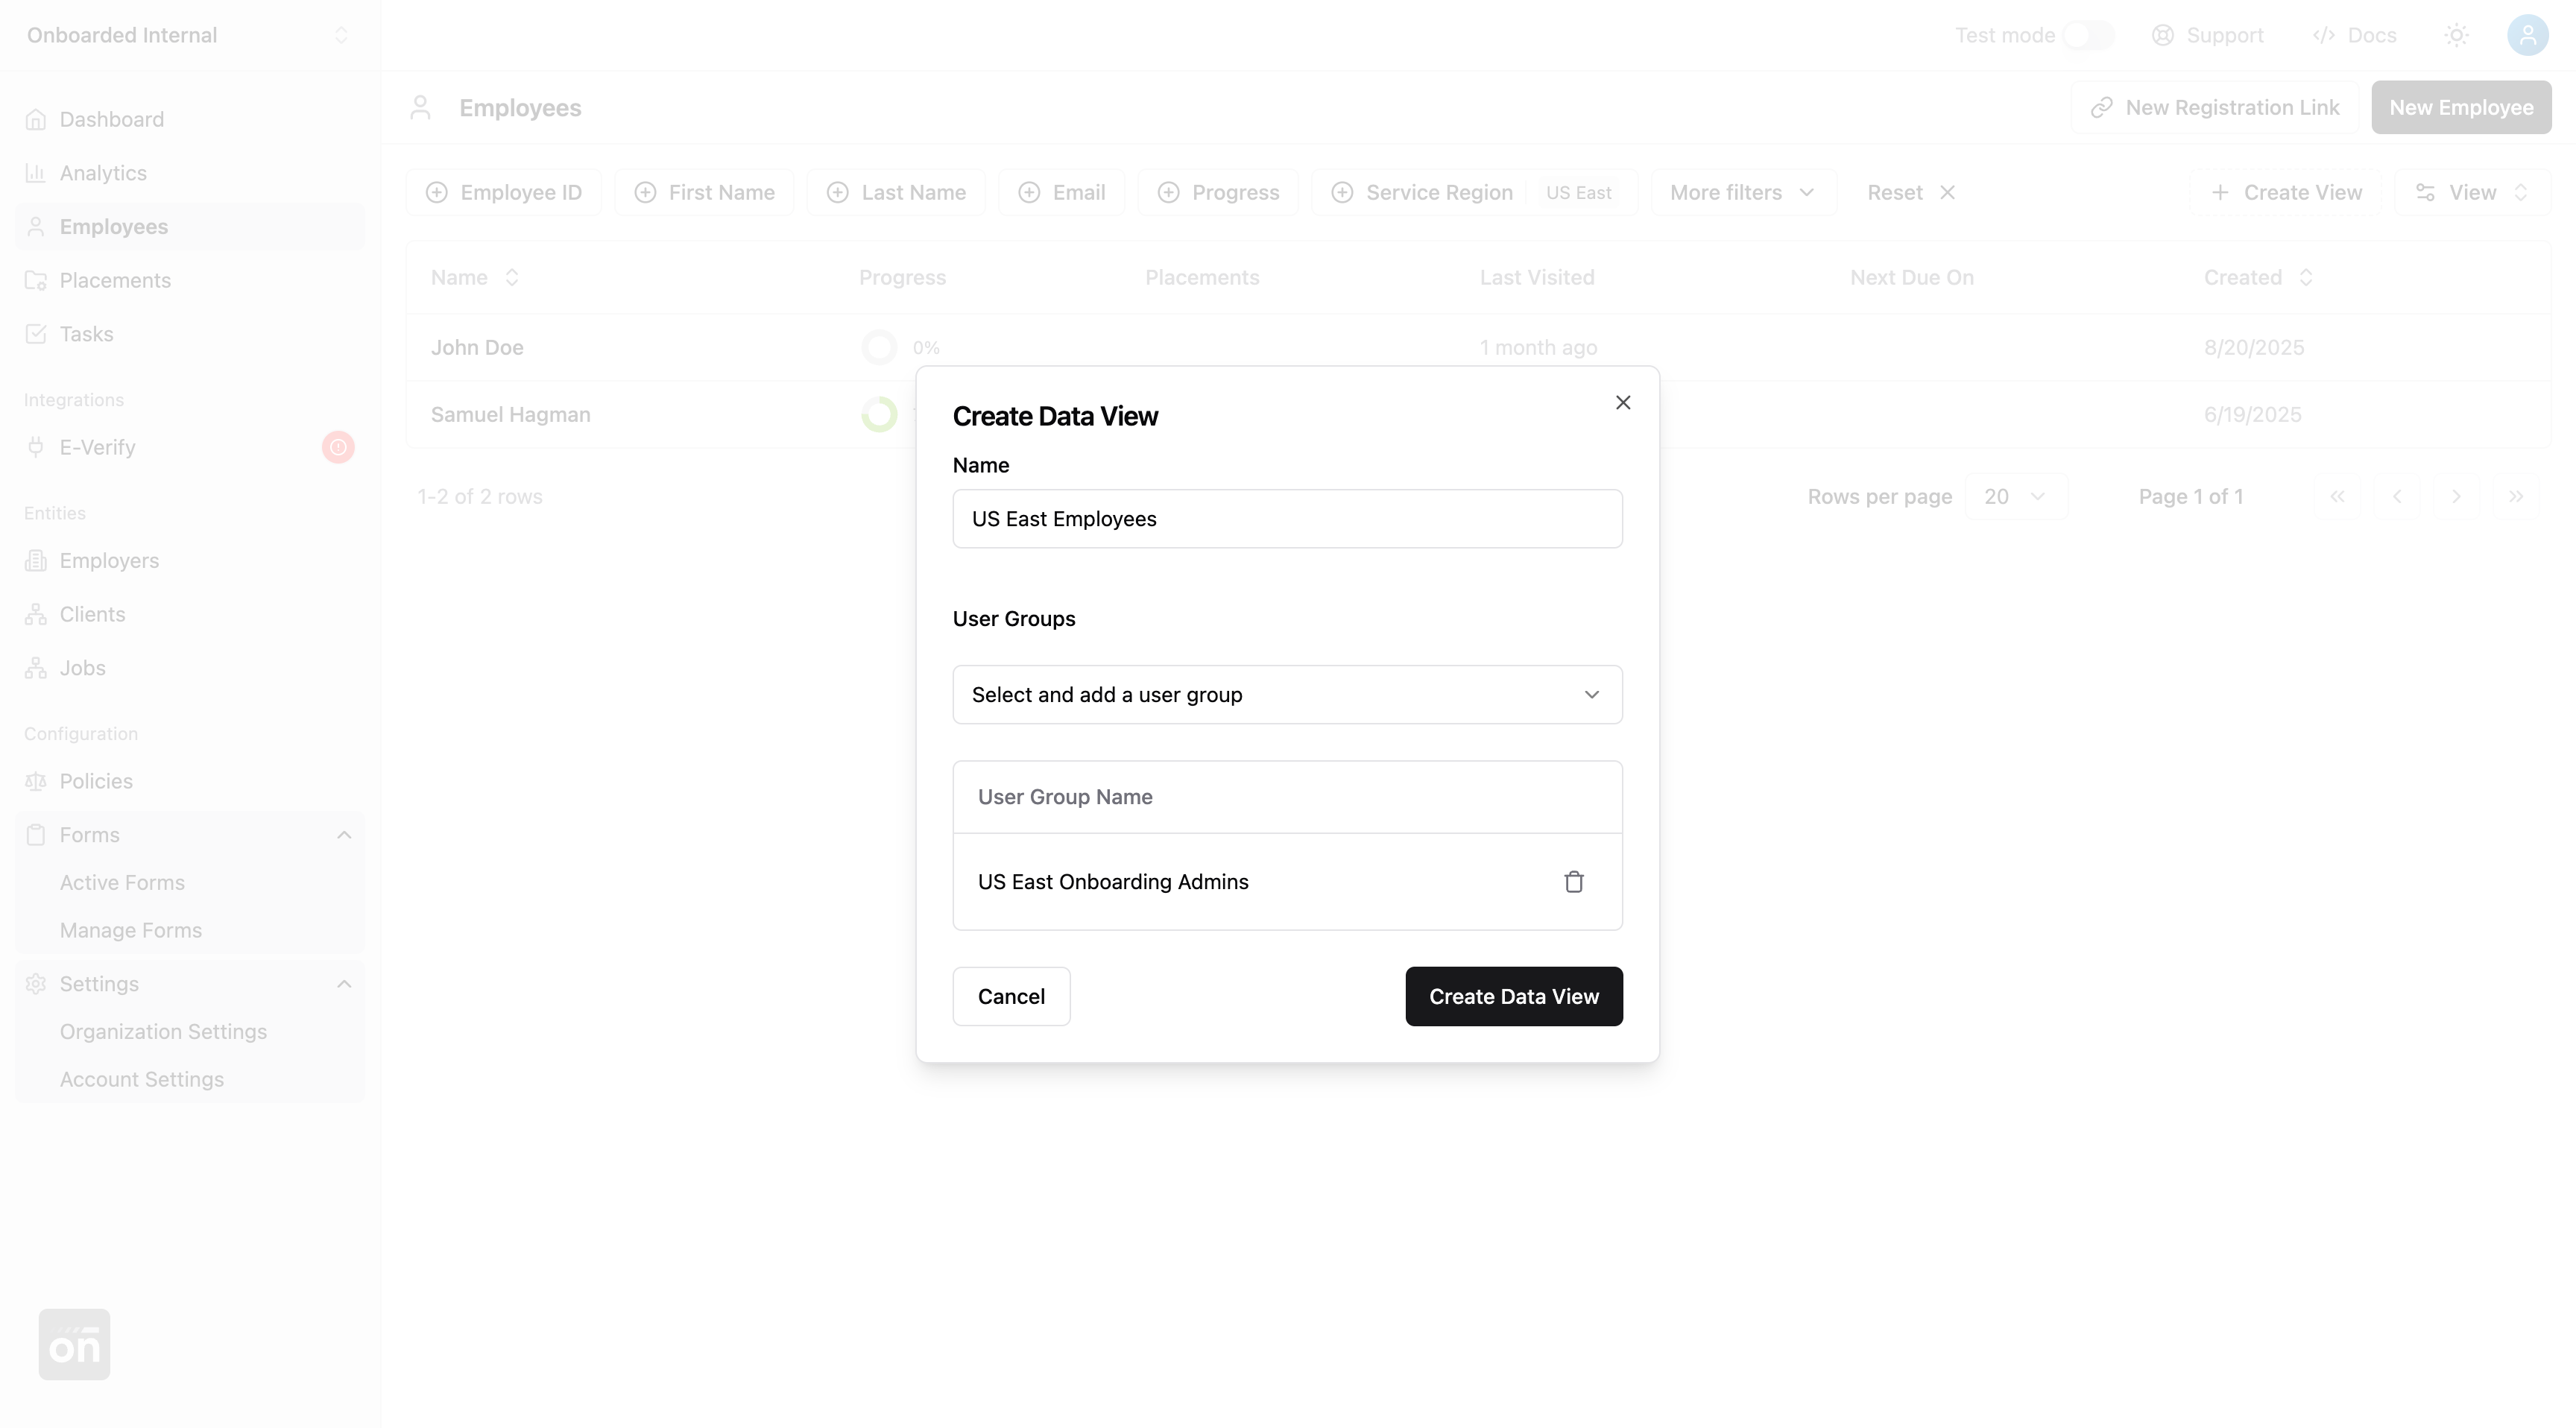
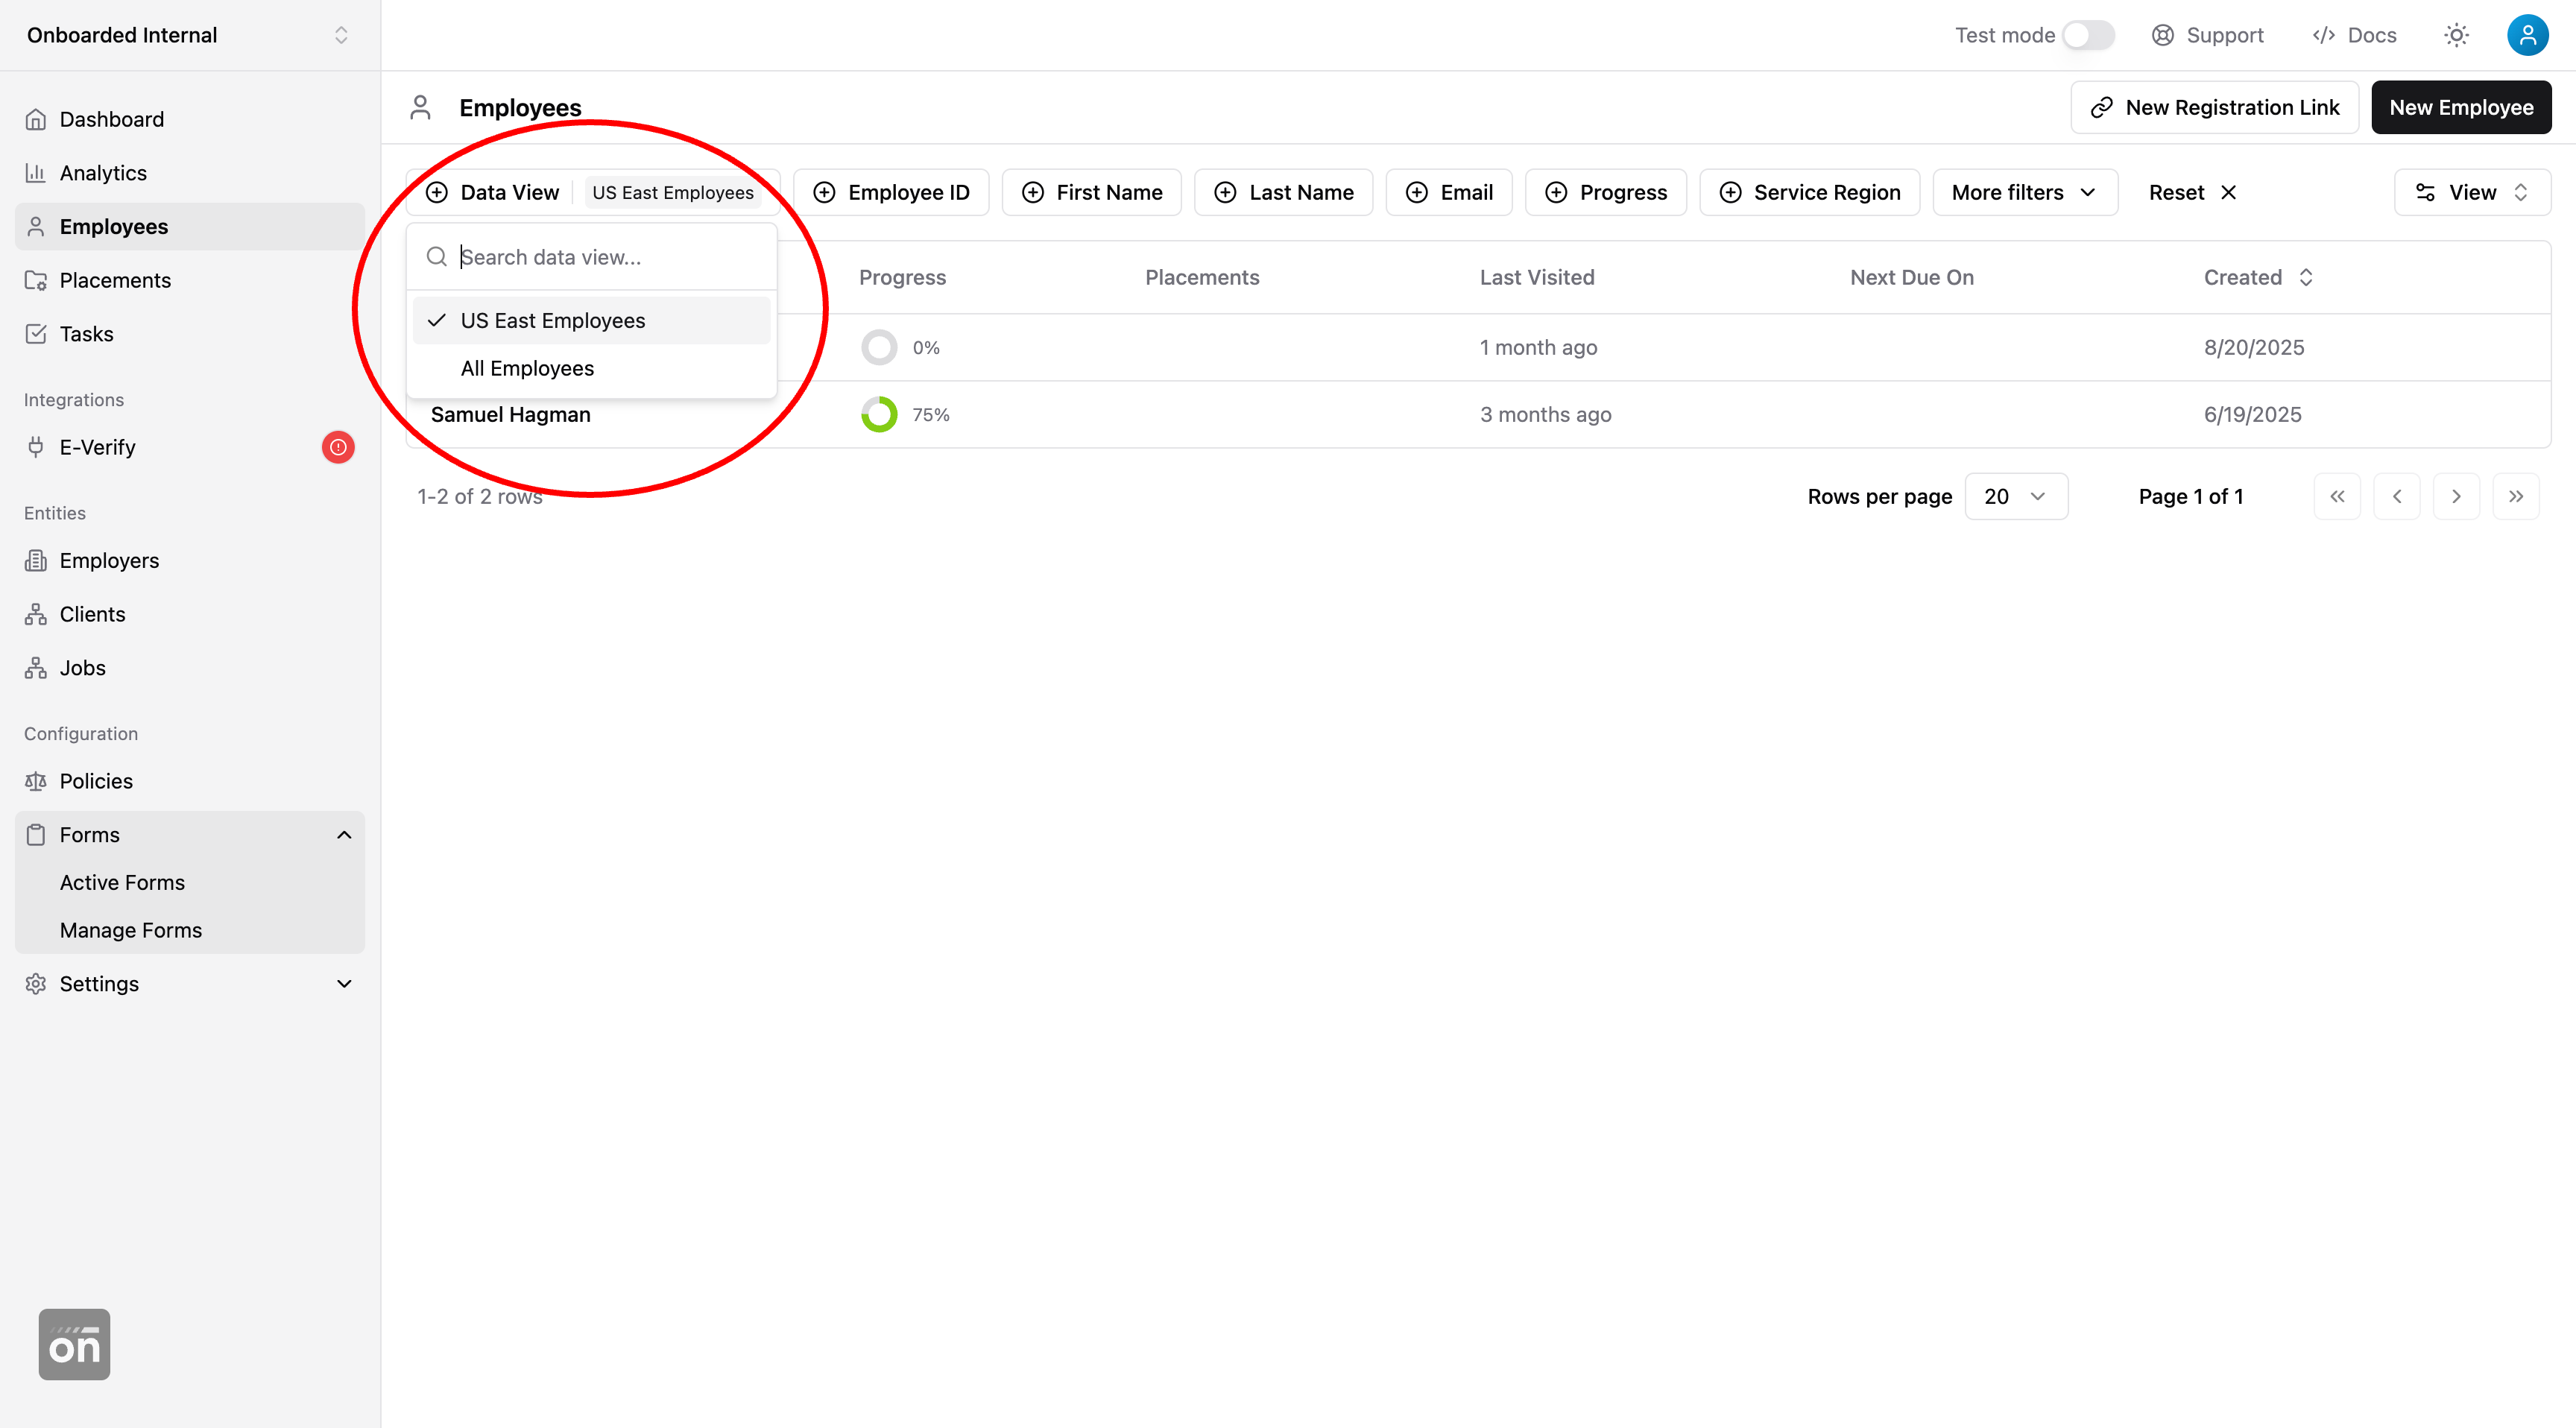
Give the data view a name and select the user groups that have access to it. In the screenshot below, we're giving the "US East Onboarding Amins" user group access to this custom employee view.
Now, assuming we have removed all users' access to the default employee view, members of the "US East Onboarding Admins" will automatically see the filters of our new data view applied when they click on the "Employees" tab from the navigation menu.
When a dashboard user receives access to multiple data views with the same entity type, they will see a data view selector that allows them to switch between the different views.
Similar selectors can be found on the home page, task list view, and placement list view. These selectors allow users to filter tasks and placements based on the employees from the selected data view. By default, giving a user access to an employee data view also gives them list-view access to all the tasks and placements associated with employees from that view.
Users can only change or remove the built-in filters of a data view if they have access to the default view of the same entity type. In the example above, we see the "Service Region" filter greyed-out because the user doesn't have access to the default employees view.
Users, however, can add additional filters on top of built-in filters to further reduce the displayed data set. Setting additional filters doesn't require any special permission or access.
By default, all users have access to everything inside their Onboarded account. For customers that require sophisiticated access management, we recommend following the steps below to set up your data view strategy:
- Create an "admin" user group for super admins. Users in this group should have full access to manage your Onboarded account.
- Go through each default data view. Remove the "All Users" group and replace it with the "Admins" group. This sets a clean slate for all users who are not super admins - they will by default not have access to any data view and see a mostly-empty navigation menu.
- Create user groups for the non-admin users based on their role, function, or any other custom data your integration provides.
- Assign either the default data view or create custom data view for those users groups so that they have the data access they need to do their jobs.